|
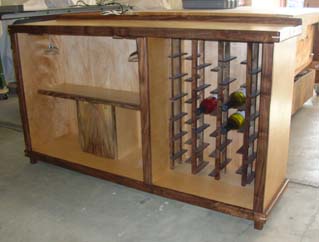
Wine Cabinet
This wine cabinet starts with a basic plywood box. We add some walnut trim and a nifty bottle cradle to create an interesting, practical piece of furniture. Follow along, you can do this!
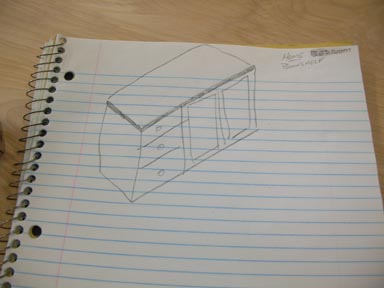
We thought we were going to build a bookshelf/dresser for the bedroom and came up with this plan. Really, this is the extent of our drawings for the entire wine cabinet project. So if you were hoping for some free plans, this is it. We solved the problems along the way and only after getting the basic box together did we realize that the wife didn't want that particular space filled. So much for the big surprise.
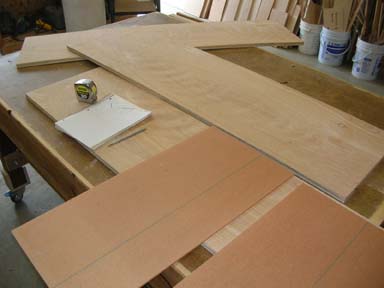
3/4-inch birch plywood makes a solid base for any cabinet design. Sometimes it can be overkill, but with anything that sits on the floor, plan for someone to someday sit on the thing and you'll be glad you used 3/4.
A new dado blade setup has been on our shopping list for awhile and we took the opportunity to purchase this one at the Rockler store for $100. This thing really makes a nice clean, smooth cut. When setting yours up, take the time to make a zero clearance insert for the table saw. To do that, cut out a piece of 1/2-inch plywood to rough shape, then use a flush trim router bit to finish shape it. Attach it to the saw and slowly raise the blade from underneath. BE CAREFUL when doing this. Spinning sharp things do not care when they hurt you.
Always run a short sample of the dado setup before committing your project stock. Here you can see how clean the cut is. We used this to check the groove width against the material we were using.
Rather than squirt glue from the bottle, we like to use a plastic bowl and clipped bristle brush. This process calls for pouring some glue into the bowl and applying it with the brush. If you leave the bristles long, glue gets flung everywhere. Too short and it's a pain. About 3/4 inch works pretty well. This method also frees up a hand when trying to put pieces together. After you are done, pour the remaining glue back into the bottle then rinse the bowl and brush with hot water for reuse.
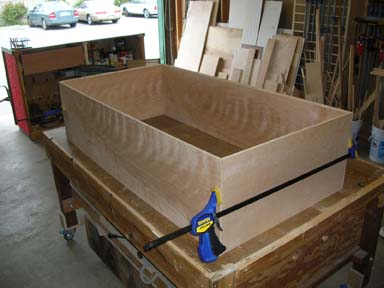
A large work surface is needed when dealing with a six-foot cabinet. We used to use the garage floor. Then we graduated to folding tables. Now we have a big workbench on wheels.
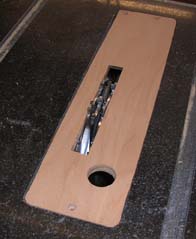
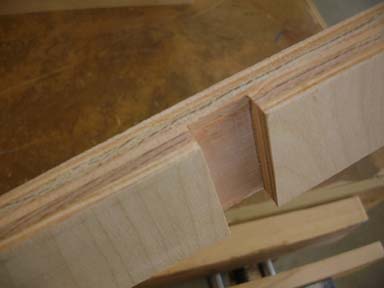
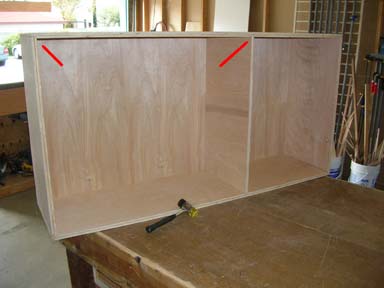
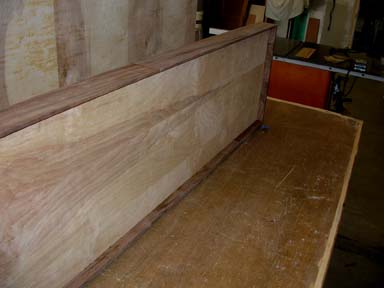
This wine cabinet will have trim around the top. So we knew that we could leave the exposed end of the plywood on the side. Our dado setup allowed us to rabbet the top edge. We also dadoed a groove for the center divider. The red pointers show where we did this. Any design is possible from this assembly position.
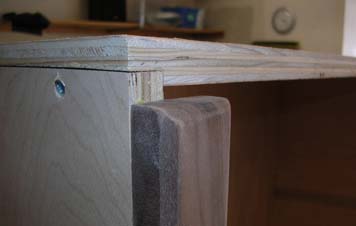
A closer look at the side joint reveals how the rabbet works. Coming over the sides is stronger than having the sides screwed into the top edge. Here the front trim piece is in place and you see how we left enough space for the top trim to come down over the screw/rabbet. Our top will be made separately, thus doubling the top thickness to 1 1/2 inch for a very sturdy design.
The trim on our wine cabinet is milled to 3/4 inch. Along the backside we used a more elegant, taller, thinner piece. This view show the underside of our top. It will sit over the basic box.
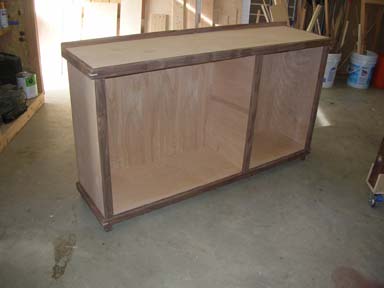
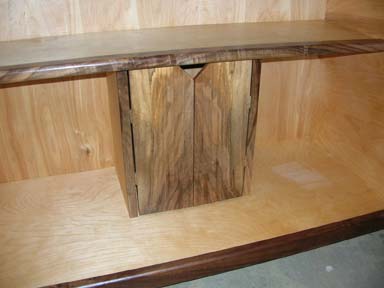
Again, we are concerned about strength. Since we don't want legs under the middle, we decided to put a hardwood runner under the front center of our cabinet. It might not be necessary, but it doesn't cost anything and made us feel better.
Feet are made of walnut and screwed with long screws through the bottom and into the side panels. We don't want someone to accidentally break one loose when moving this wine cabinet around the house.
The wine cabinet is really taking shape at this point. We have the box trimmed out with walnut along the front, side, and bottom edges. The top carries its own trim. From this angle, you can see why we still think of ourselves as beginning woodworkers. Despite our best efforts, the center divider panel has the grain running the wrong way. All other panels have up/down grain. We won't make that mistake again. Keep your wits about you. This error is more of an annoyance than a real problem.
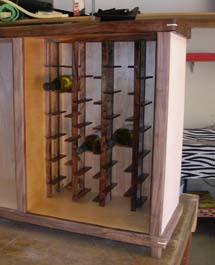
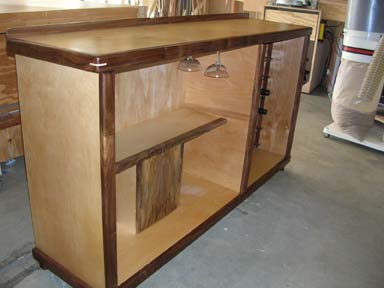
Once we abandoned the bookshelf with drawers plan, we were faced with how to display wine bottles. We considered glass or sliding doors, a wire rack, and even simple shelving. Out of the blue came this staggered bottle idea and we made it work. You can use any which way you can think up.
For the left side of our wine cabinet, we went with a shelf. Then to add support without visible screws, we made a semi-secret compartment out of 3/8-inch English walnut. The doors have rare earth magnets on the edges and attract each other when closed. We made sure that a standard bottle of wine would fit inside before cutting to final dimensions. The shelf is made of the same 3/4 birch plywood used throughout. A trim strip of walnut covers the exposed edge.
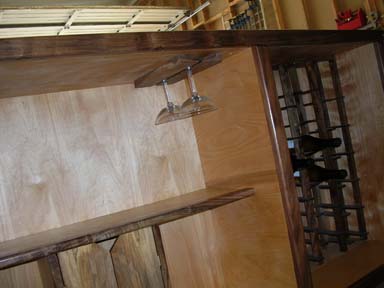
Some angle cut walnut scrap makes a great wine glass holder.
In anticipation of hard use and spills, we used several coats of polyurethane to finish our wine cabinet. The tall back trim edge will keep things from rolling off the back. Our choice of black walnut for trim and use of English walnut for the shelf area contrast very nicely with the birch. Hey, sometimes the magic works.
|