Table Stand
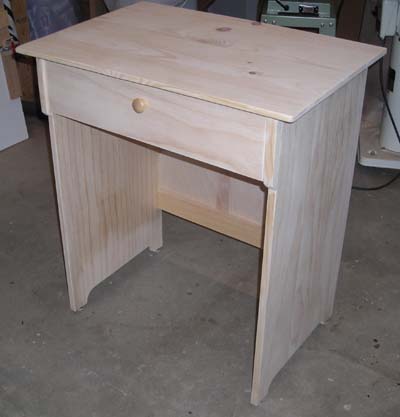
This basic table stand was built in a few hours using a table saw, biscuit joiner, and standard hand tools. A man dropped by the shop and asked if we could make him one to fit a specific spot in his house and of course we said yes. His requirements were that it not be so big as a desk, yet be able to support a computer and have enough room underneath to put his legs when sitting at it. We decided upon 32 inches tall, 18 inches deep, and 32 inches wide.
Our customer wanted a simple pine piece, saying that he wanted to do the finish work himself. We think he wasn't sure what he wanted, but didn't want to appear ignorant. He wasn't open to too many suggestions, though we did insist on some proportional aspects. We pulled out a tape measure and used it to illustrate how big 30 inches actually is, talked about standard desk heights, and what space he had to fill.
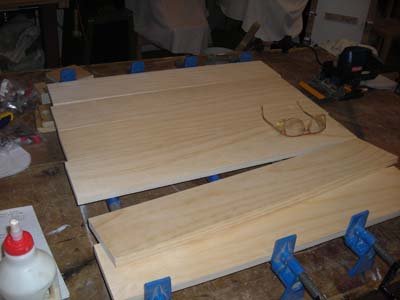
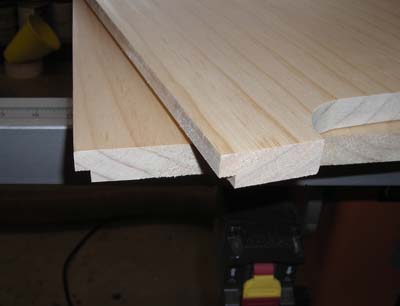
Dimensioning the pine boards is straightforward with a table saw. You could do it with a hand saw, but it will take awhile. The above image shows our glue-up pattern for the sides. We used three boards per side to get the width we needed and biscuited them together.
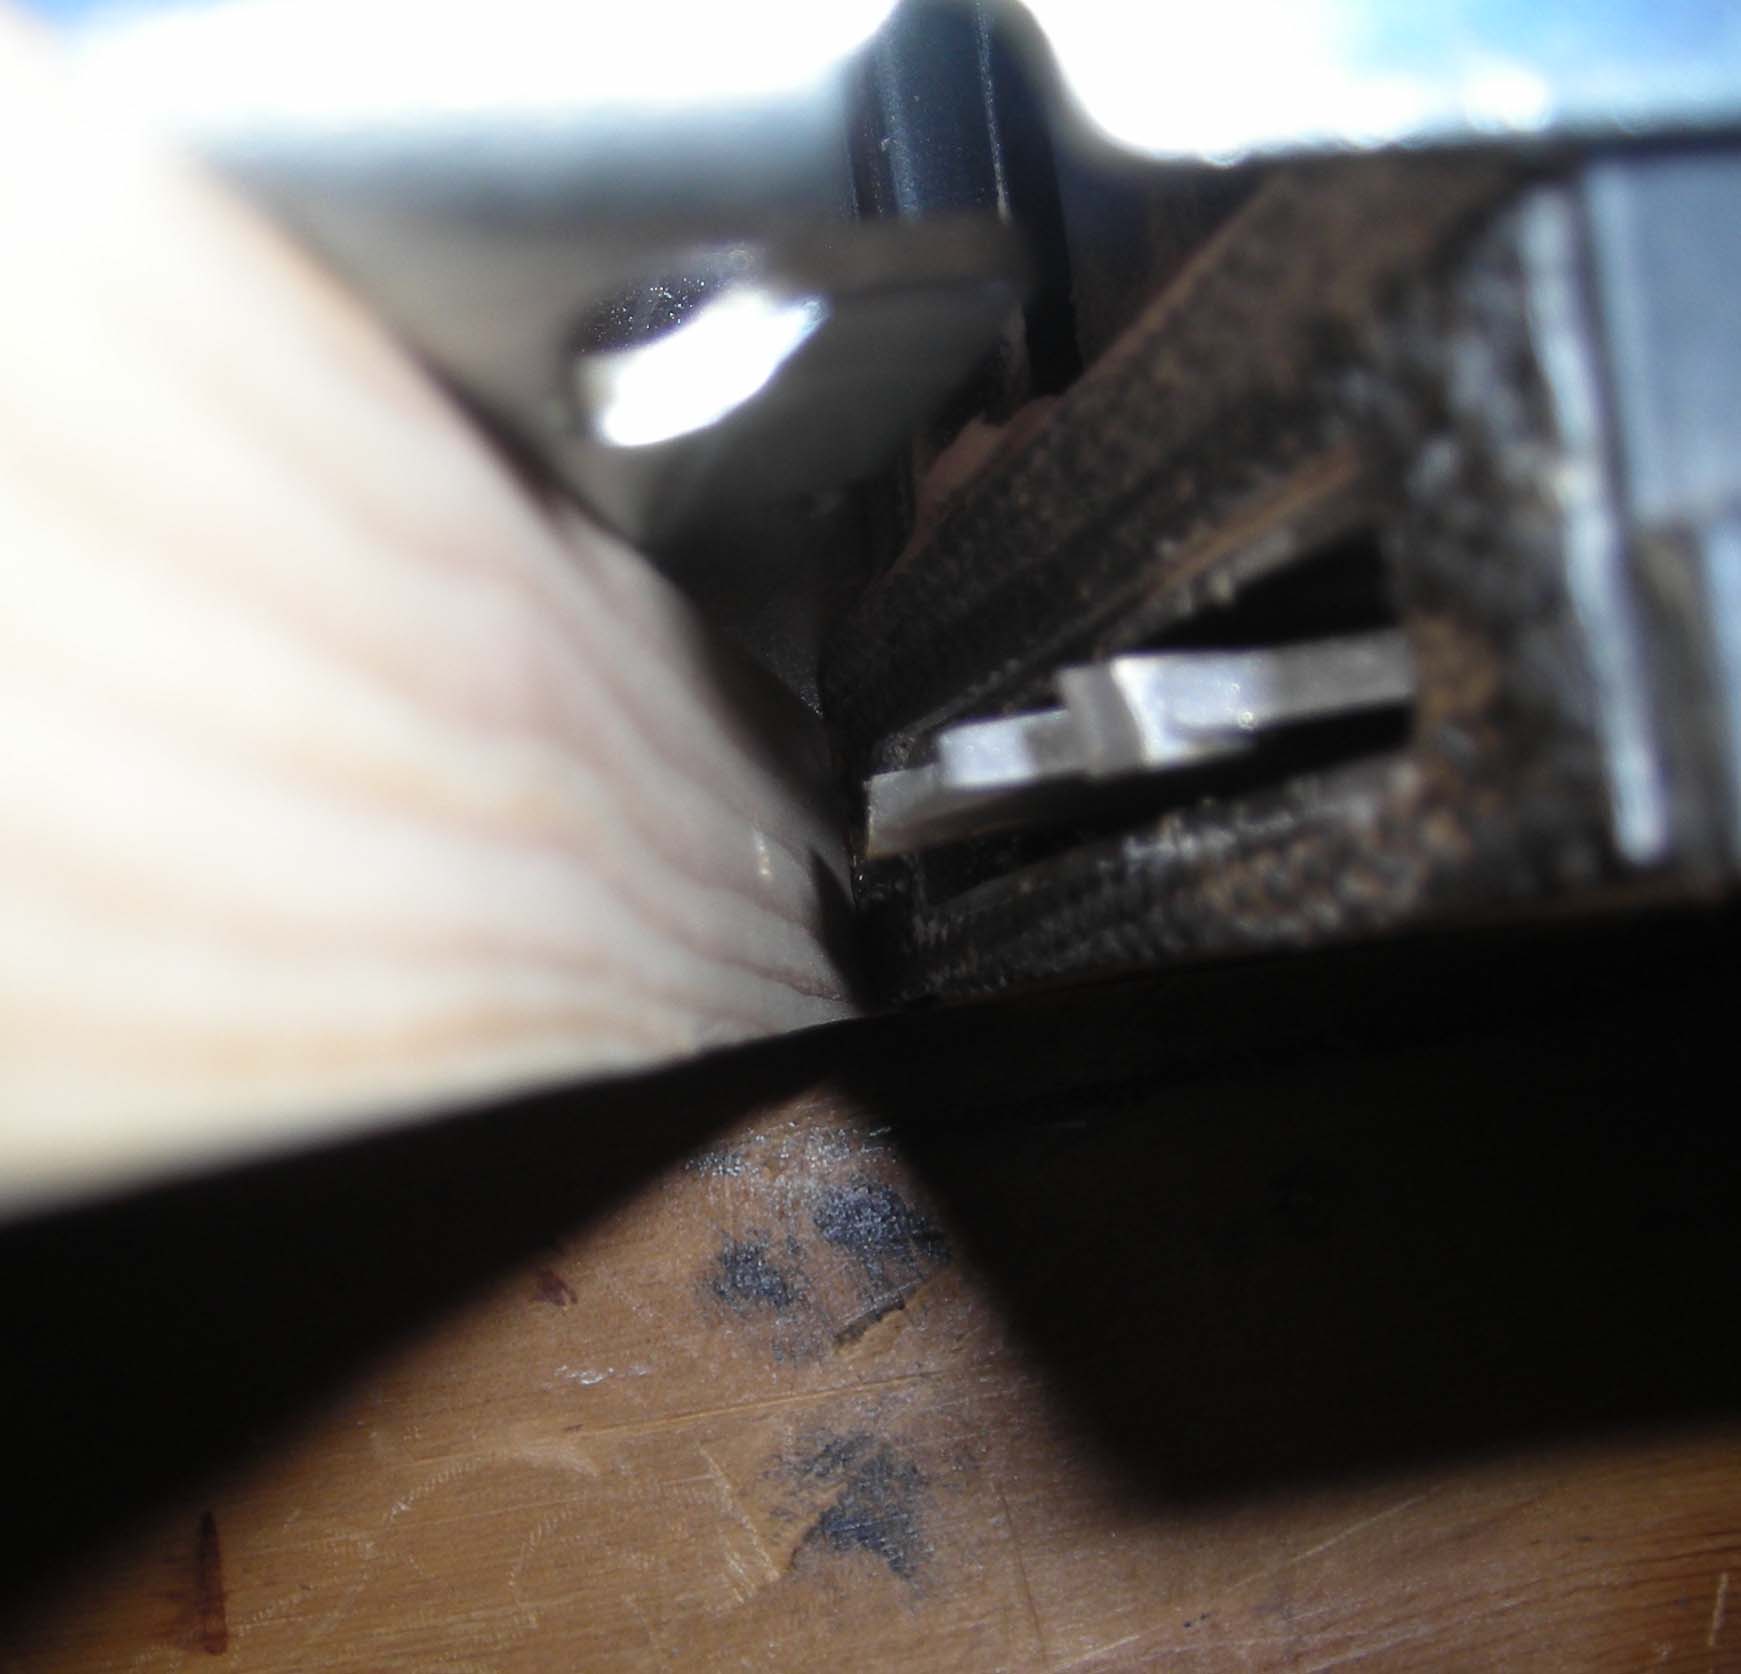
Here's an up close look at the business end of our biscuit cutter. The blade resides inside the body until engaged by hand. This is a very safe power tool. The actual depth measurement is not critical, but you should set your tool for about half way through the material.
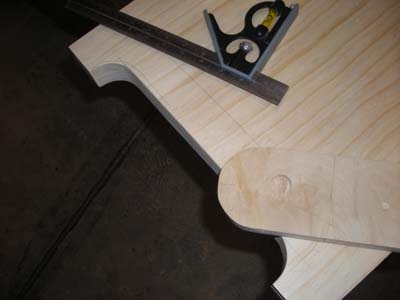
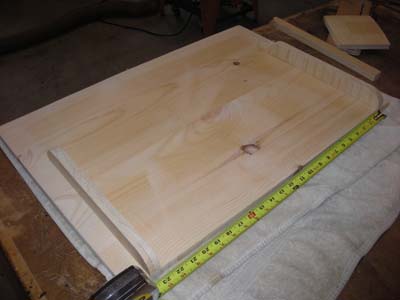
To lighten the look, we made this design at the bottom of the sides. By removing some material, our table stand looks a little fancier, lighter, and more finished than if we left the sides completely straight. Any simple curve will suffice. We used some layout tools to make sure we had the design in the center, traced the curve from an old piece we had lying around, and cut it with a jig saw. We scribbled it out a couple of times before deciding how deep to go. Then we clamped and cut them both at the same time.
Our table stand has a 1/8-inch plywood back. To accommodate this, we cut a rabbet along the back edge of the sides. This can get tricky in that your two sides are not exactly the same. One is left, the other right. Stand your sides up and mark which edge to cut. If you mess this one up, you have to readjust everything. So don't mess it up. We have before and almost did this time too.
We glued up our top the same way we did the sides, then cut a slight bevel along the front and two sides. To locate the sides in relation to the top, we could have performed some math, but have found that on custom pieces it's simpler to set scrap pieces in place and measure from there. Here, our top is lying upside down and we are using to scrap pieces to help measure for our back supports.
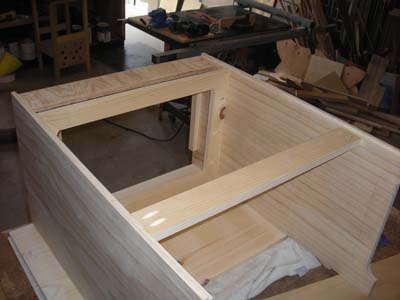
Here's what we were measuring for in the previous image. We used support stringers across the back to hold our table stand together. The length was dictated by the distance between our bevel cuts on the top, minus the width of our sides. We used pine at the bottom because it will show. Glue and pocket screws hold it together
You can see our drawer support near the top left of the image. It's made of pine with 45-degree angles in a picture-frame arrangement then attached to the sides with pocket screws. Our drawer will slide across the top of this frame on small plastic glides.
Once the back is in place, we measured the opening for our plywood back and cut it to size. We attached the back with screws into the stretchers, though we could have nailed it.
As with our stretchers, we waited until the box was complete before making the drawer. We cut and assembled the back and two side, then adjusted the front to fill the forward opening. No mechanical drawer glides were needed as the drawer will likely not be carrying much load. We cut a narrow groove along the insides of the drawer to allow the bottom piece to slide into place. The drawer back is left short and the bottom piece is held against it with a single screw.
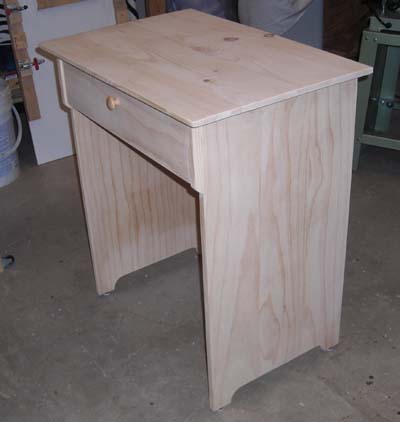
And there it is. Pine sands and works easily. It will also accept a variety of finishes. Had we needed to reproduce this table stand, we could easily create a drawing and streamline our process. As it was, we were able to settle our dimensions en route and adjust our methods along the way.
