|
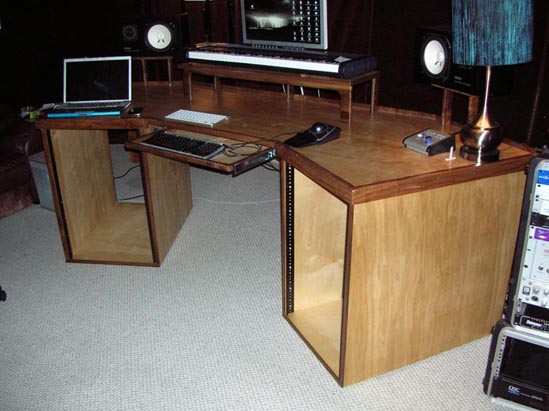
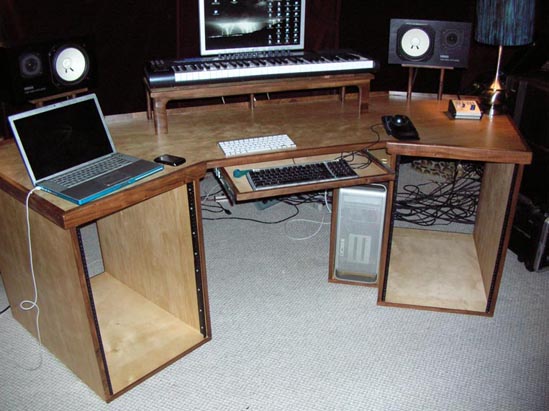
Studio DeskThis studio desk is built of 3/4-inch birch plywood, pocket hole joinery, and boasts walnut trim along all edges. A simple finish of polyurethane brings the wood to life and really sets the project apart.You'll be surprised to see how easy it is to make one of these yourself. And it's not difficult to adjust the dimensions to fit whatever need you may have. As it happens, a neighbor of ours is in the music industry and has recently converted his garage into a sound studio. He was previously using a folding table to carry his equipment and was in the market for a more efficient arrangement. With so many musicians coming by, he also wanted something with a little pizzazz.
The requirements called for standard 30-inch desk height, under table placement for a computer, two equipment bays at 19-inch width, a keyboard platform, slide-away computer keyboard tray, and two vibration dampened speaker platforms. That sounds like a lot of trouble, but we've found that the more specific the customer is, the better it works for all involved. Think about it, with too many options, you'll spend a ton of time trying to figure things out. With specifics, you build to fit the need. Cool.
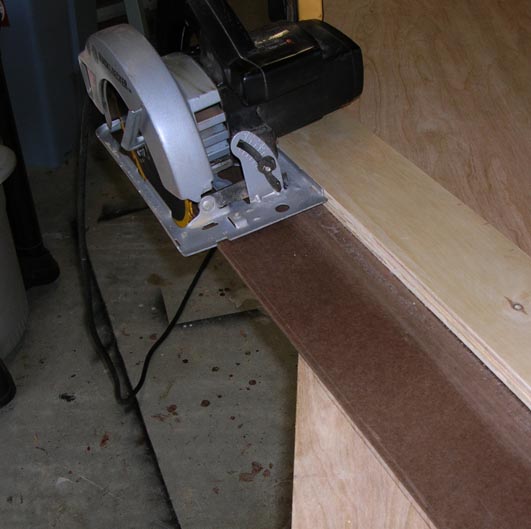
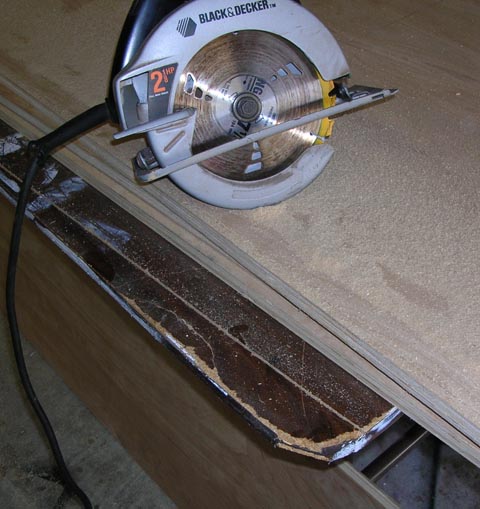
We used two complete sheets of plywood for this studio desk. The top is made from one piece, with the corners shaped. The home center won't make angle cuts for you. While a circular saw can handle the job, we suggest using a guide like the one here. It's a straight piece of plywood (hardwood would be a better choice, for longevity) with a 1/8 piece of hardboard screwed on. The hardboard is cut to the exact width of your saw by the saw itself. To use it, simply align the (brown) edge to your line and use it as a straight edge for making the cut. Your saw will always cut the same way.
Of course, if you get paying too much attention to the saw and guide, you might forget to look underneath and cut your table. Luckily, we only went half way through and there were no witnesses.
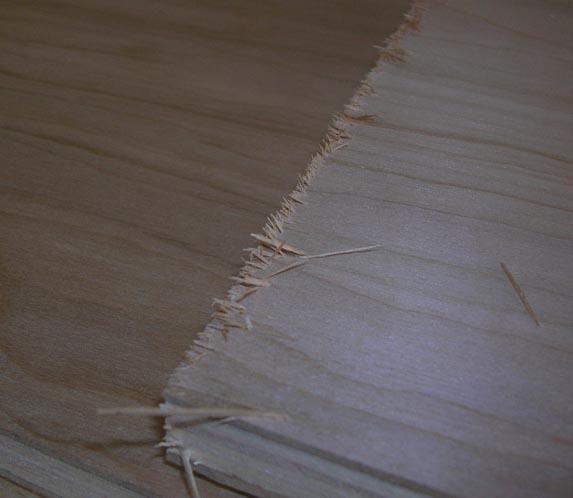
Here's something else to watch for when cutting plywood. Tear out. This is caused by the saw blade tearing through unsupported material. A circular saw cuts with an upward rotation. If you use a guide as shown above, the brown guide line will add support and reduce tear out. Make sure that the (brown) part is over the "good" side. There are specialty saw blades for cutting plywood, but we've not used them.
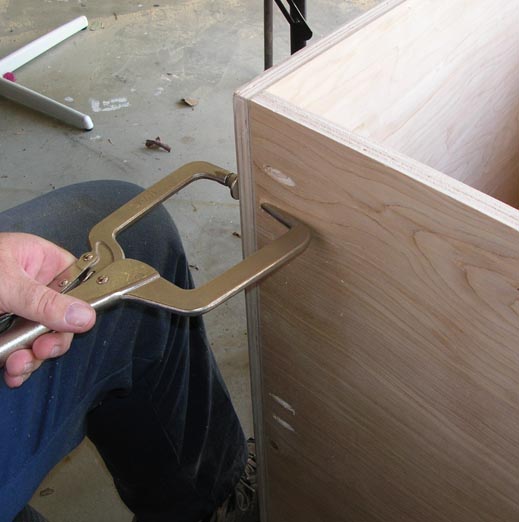
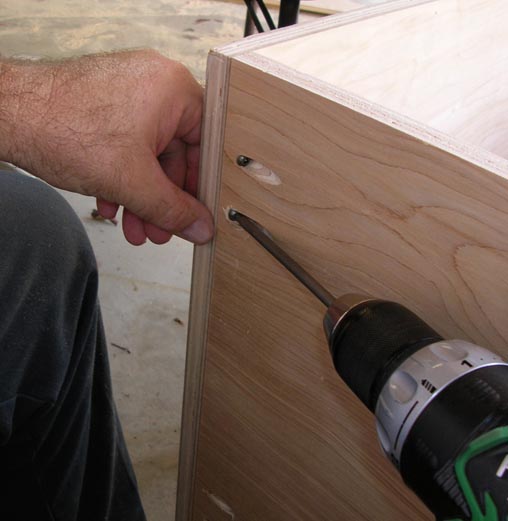
After sizing our plywood, we planned and drilled pocket holes across each end. Here's a neat tool for clamping two sides together while trying to align them to driving screws.
Pocket holes are great, but they require a couple of additional tools. Maybe that makes them even better. hmmm... A standard screw driver bit will not allow the body of our drill motor to reach in close enough to drive the screws. So we got a long bit for the job. It works very well. Pocket screws typically have a square drive head for greater turning grip. Make sure you get the right bit for the screws you are using. You can fake it sometimes when using different sized Phillips screws, but not so with square drives.
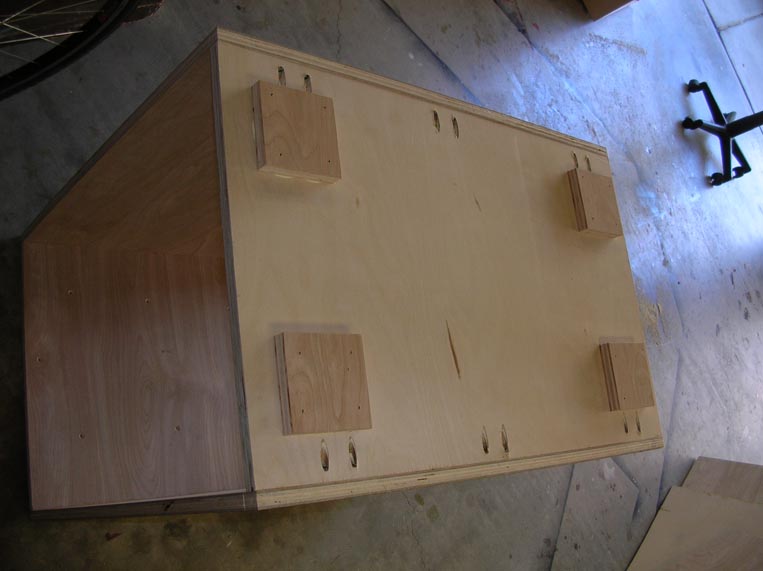
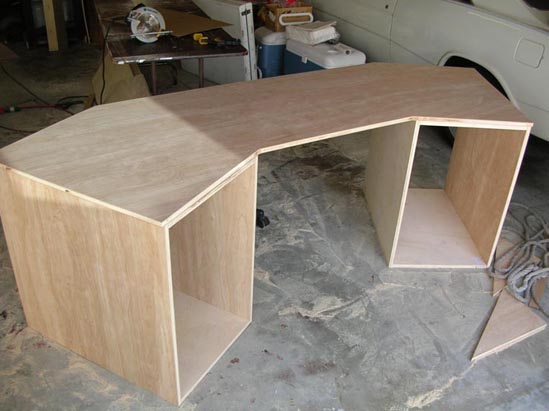
We designed our studio desk to have two identical equipment bays on either side of a sitting area. Here's one bay lying upside down. The square blocks act as feet. Since we know our destination floor is level and there will be carpet in place, wheels or adjustable feet are not required. Placing the entire base on the floor (footless) strikes us as wrong. Thus the pads.
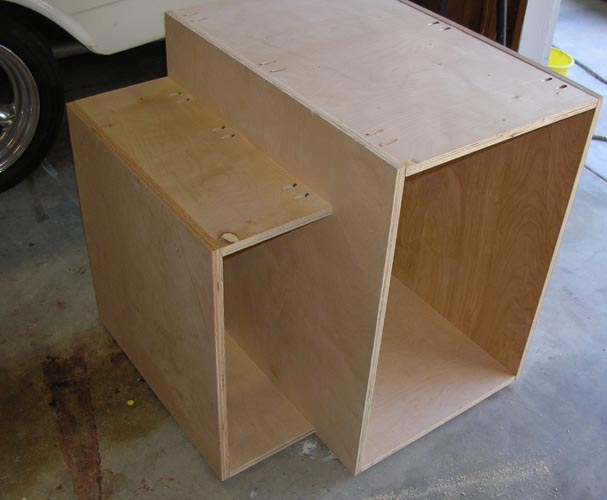
OK, so our two bays are not exactly the same. Here we've added a computer surround. It is intended to reduce the cooling fan noise and help direct the cables out the back, away from the user's feet.
Our assembled studio desk is taking shape! Again, the top is a single 4x8 sheet of 3/4-inch birch plywood. The sides are built of the same material. It looks as though we have a coloration problem in this image, but that's only the sun laying a shadow on the project. With a double layer of plywood on the equipment bays, should an errant butt decide to place itself on one, there will be no structural issues. We measured and drove screws up through the bays into the top to maintain alignment.
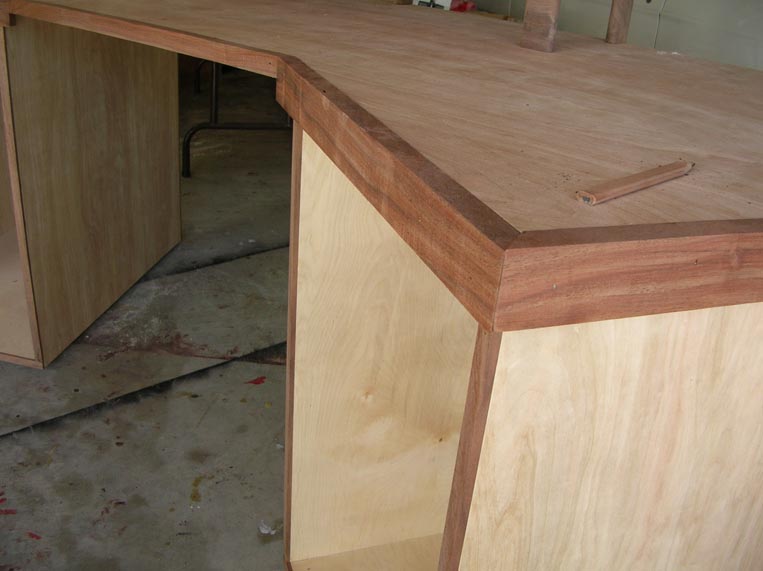
To add some striking color and a bit of class, we used California black walnut as trim on our studio desk. People think walnut is the most expensive wood out there. Actually, it's in the same price range as mahogany and maple. And it's easy to work with.
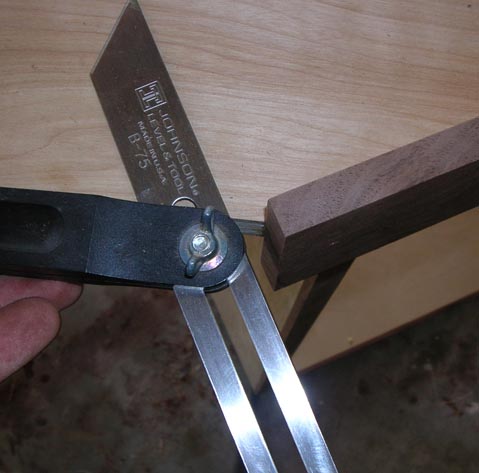
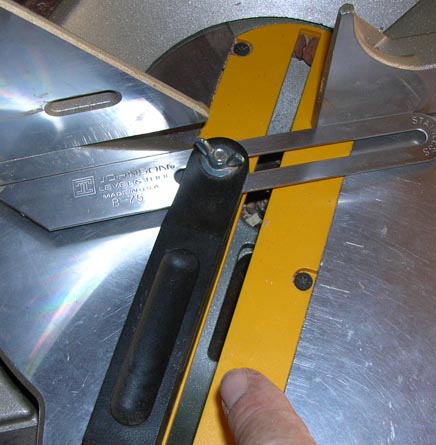
We don't know what the exact measured angle is on the trim pieces, but there is an easy way to work your way around the top. Using an adjustable tool like this, you lay the black side along where your next trim piece will go and turn the metal part to match the angle of the other trim piece...
...then take that tool over to your saw and adjust the cutting angle according to the tool angle. The exact degree reading is not critical. If you are working your way around the top, make sure you keep the angles as regular as possible. Nothing too large or small or weird.
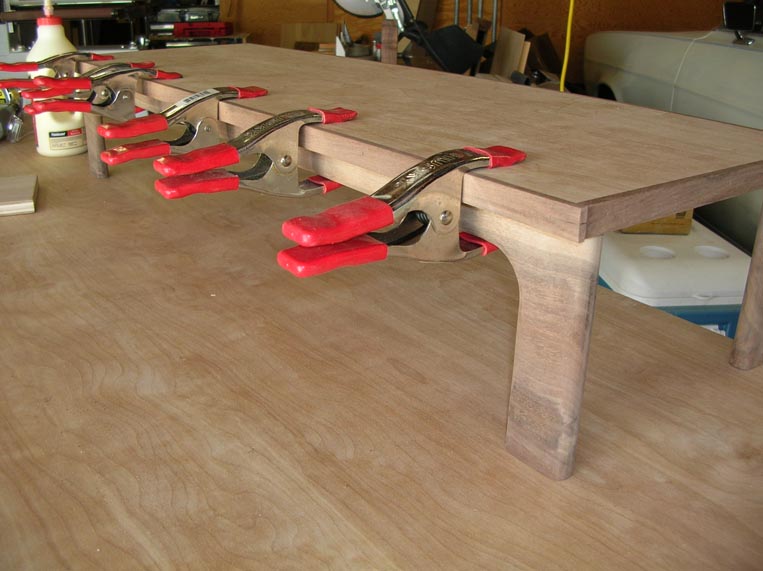
We used a walnut-framed piece of plywood for the keyboard table. Here you see how we shaped the support legs and clamped them in place while the glue dried.
Walnut is dark in color, birch plywood is inherently light. The contrast is beautiful. With a couple of simple coats of polyurethane, this studio desk will handle a lot of traffic. Our local music store supplied the standard equipment rack mounts. Once the equipment bays are loaded, this place will be rockin'!
|