|
Kids Woodworking ProjectsWe have two kids ourselves and recognize the value of kids woodworking projects in getting children interested in woodworking. Trouble is, when a child puts in the effort to please you, you are too often confronted with the reality of what to do with the thing they made. Here are three basic projects to get you started. All were built by young hands and are used everyday in our home. Keep in mind we're talking seven to ten years old with these basic designs. The "process of building" is what is most important. Let your child handle the tools, do the sanding, and decide what color. To help the process, pre-drill the holes before having them drive the screws, give them three or four color choices rather than ask an open-ended question, have them do the painting (be prepared for a mess!), and let them start over if they need to. We were recently surprised when our high school sophomore came home from a summer engineering program and said that she was one of the few students there who had ever worked a screw driver. It needn't be that hard.
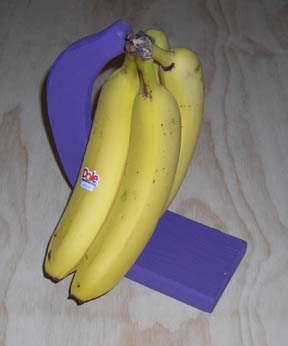
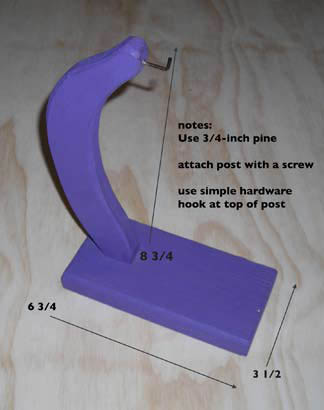
Banana Stand
A great project for kids is this banana stand. It can be made of 3/4-inch pine wood, one screw, and a simple metal hook. The finished piece will support a bunch (about 8) bananas. There is a balance issue here. The main post must allow the bananas to hang over the center of the base. We have a banana-shaped post, but any half-moon shape or swing-type arrangement could suffice. Sand or file the exposed edges and corners before painting.
We first thought we had no real use for a banana stand. But this has been a fixture in our kitchen for some time. As a kids woodworking project, this let our kids use a screwdriver, coping saw, sandpaper, and paint to make something they can see in use every day. A great confidence builder!
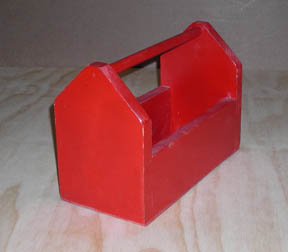
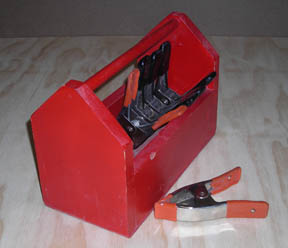
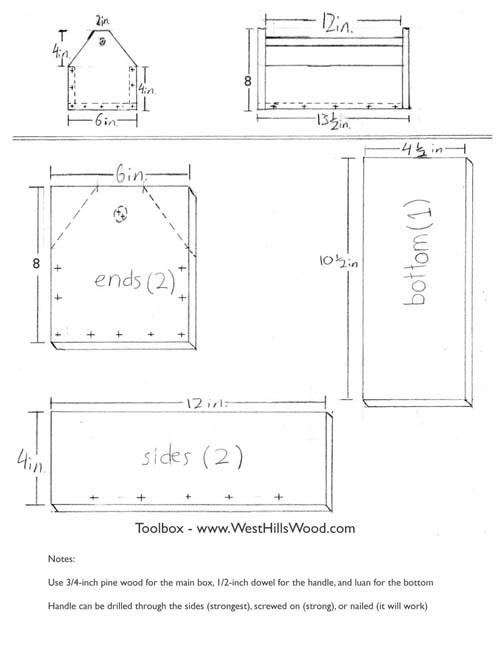
Wood Toolbx
Another good kids woodworking project that is more involved than the banana stand is this wood toolbox. Made of 3/4-inch pine and a 1/2-inch dowel, kids will use a hand saw, hammer, and physical alignment skills to build this toolbox.
This finished project will not support a lot of weight, but we found it to be a great holder for our spring clamps. The handle can be nailed into the sides as ours are or the sides can be drilled and dowel lengthened to fit through the sides for more strength. The bottom of ours is thin luan plywood, but you can also use 3/4-inch pine all around. This project gets challenging when trying to keep the sides square during assembly. Make sure to provide a hammer large enough to drive the nails but not so large as to be unstable in their hand. Encourage your child to sign and date the bottom of the toolbox when done!
This flashlight holder plan is a little more involved, so we included some directions. Click on the image and check out how to build this useful piece from parts in your scrap bucket. return from Kids Woodworking Projects to Beginner Woodworking Plans |