Hana Lima Ukulele Build
We post our project output every Wednesday on Facebook.
We bought a tenor Hana Lima ukulele build kit about three years ago. It was meant as a follow-up to our Stew-Mac soprano build.
The Hana Lima 'Ia kit brings side bending into the equation. We'd also have to do more neck shaping, jig building, and who knows what-all.
Our plans were disrupted when three Fletcher Aviation Desks found their way to us. The ukulele building dreams were put aside. This was naturally followed by the next project, then the next.
Distractions strike every wood shop and we make all kinds of things, including this six-string bass.
Well, we finally got around to the Hana Lima ukulele build kit. Mind you, this is not a step-by-step course in how to build a ukulele. Rather, we're trying to simply chronicle our efforts at completing something we thought should have been done a long time ago.
Of course we made a few mistakes along the way. But we came away with what we think is a pretty good looking and sound instrument. You know what that means, right? Yep, we'll be making more.
Hana Lima 'Ia is located in Honolulu, Hawaii and offers up a ukulele building course where you can work under the watchful eye of experts. If we had the time (and the wife's permission), we'd have gone and done that.
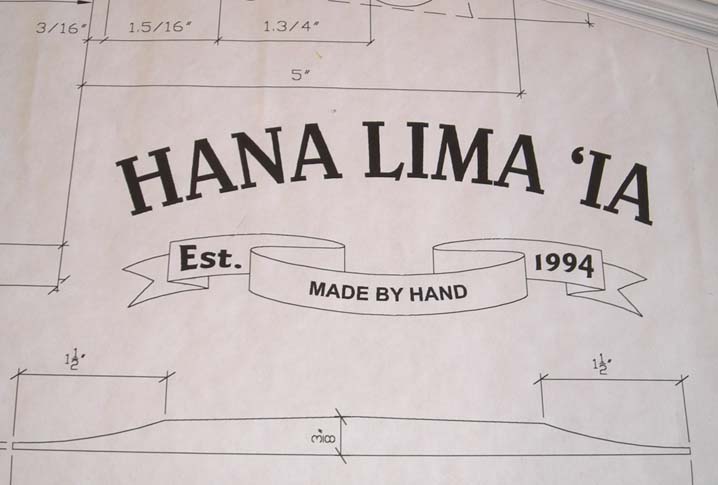
Instead, we bought a tenor Hana Lima ukulele build kit. It came with all the parts, blueprints, and illustrated instruction book. What could go wrong?
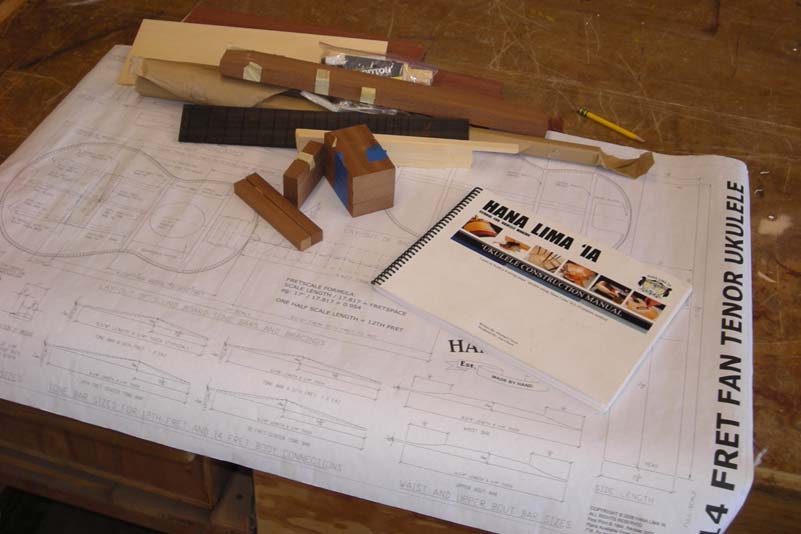
It's always a good idea to unwrap a kit and take inventory. You can make sure that all the parts are there while getting familiar with the parts themselves. There aren't so many parts to this kit that you'll get lost.
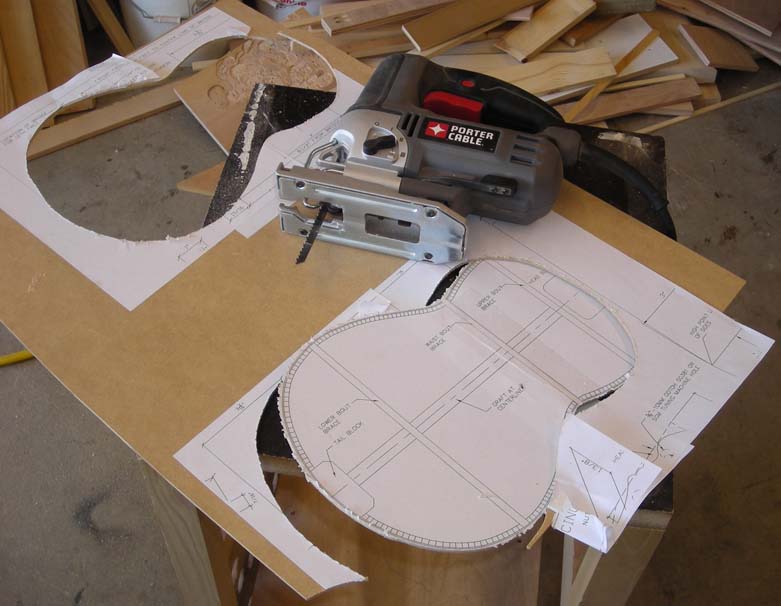
We made copies of the blueprint body parts and stuck them on some 1/8 inch board then cut them out. It wasn't really necessary, but it made us feel like we were doing something worthwhile while getting up the nerve to manhandle real kit parts.
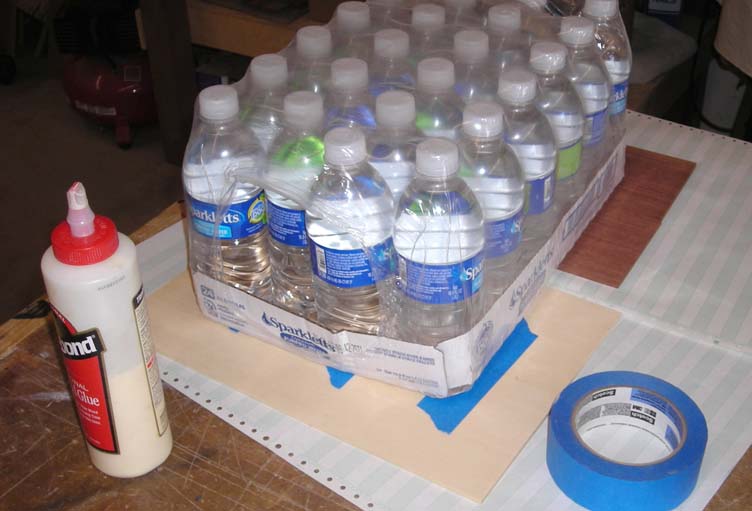
Our kit came with bubinga back and sides, spruce top, and mahogany neck. The top and back came as two pieces each and had to be aligned, edged and glued together. We built this creative H20-lbs jig to keep them flat while the glue dried.
As we went through this whole process, we became aware of a variety of jigs that would be helpful when doing our next Hana Lima ukulele build. In fact, we had to force ourselves at numerous steps to stay focused on completing the task instead of constantly making jigs. We'll build jigs later.
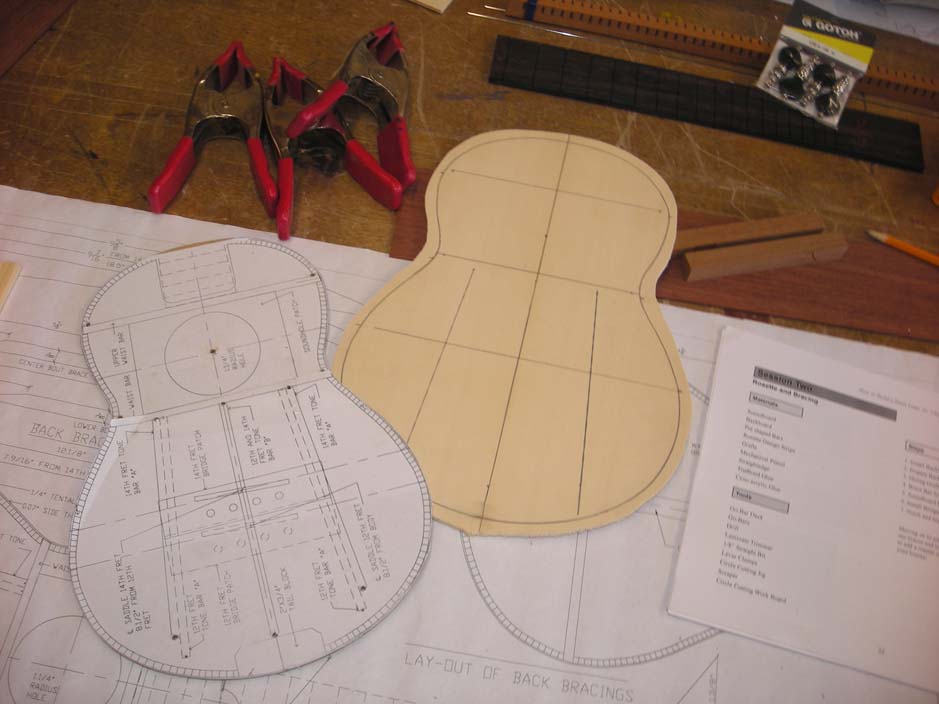
Laying out the lines for bracing and such was straightforward. Not knowing what to expect, we were pretty nervous about each step. This is where a ukulele building class would come in handy. We had nothing to compare to and no one around for answering questions.
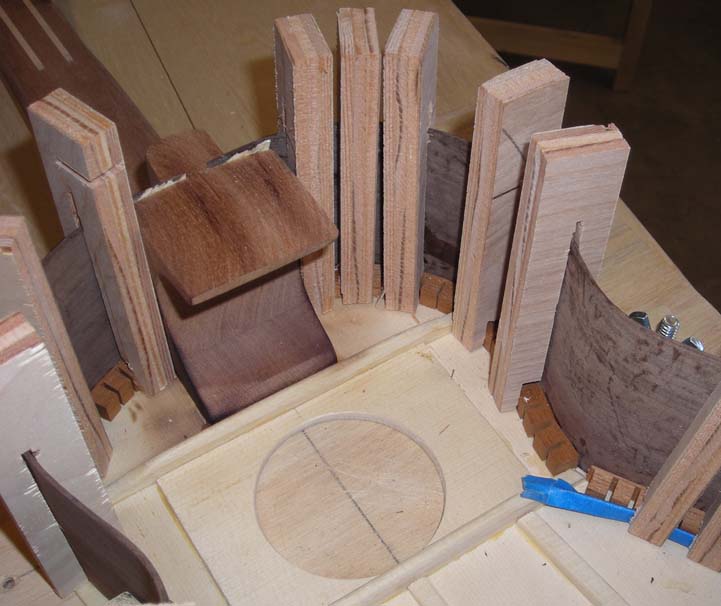
The instruction book shows a go-bar deck for holding the supports in place during glue up. Here's where having a well-stocked wood shop comes in handy. I know there are better/preferred methods of doing this, but we made this no-bar deck work.
The neck calls for something called a scarf joint. We had no idea what that was and proceeded to cut our neck at 7.5 degrees with the intention of flipping and gluing it to make 15 degrees of angle.
Turns out this won't be a strong enough joint to withstand string tension and we'd risk joint failure if not corrected.
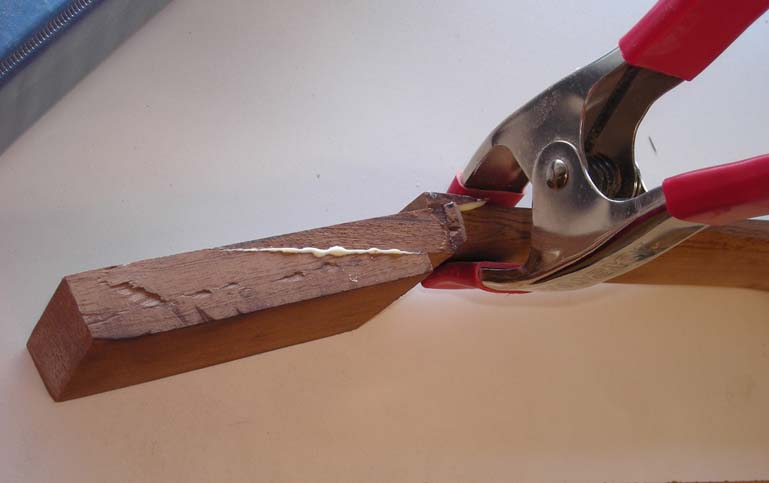
Our Hana Lima ukulele build manual doesn't have a clear photo of this scarf joint. We left the glue visible to show you where it is. This cost us some anxiety.
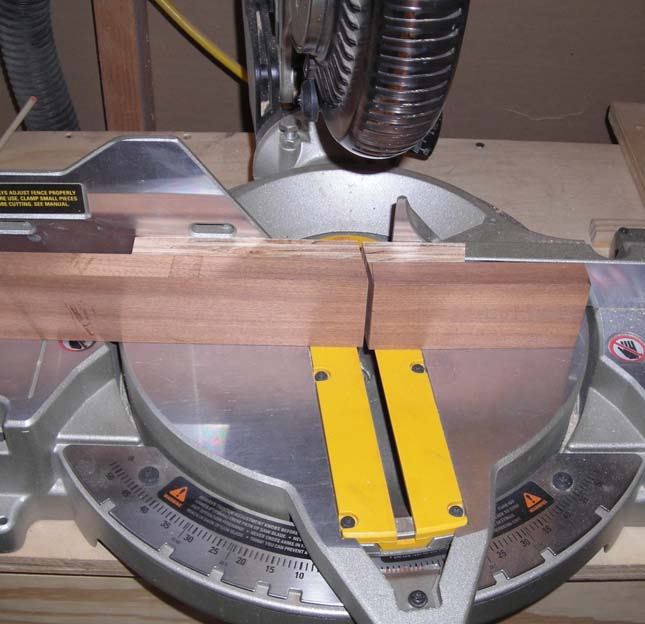
A table saw comes in handy when removing some of the extra neck wood. Our shop table saw sled helped keep our fingers clear. You can remove this excess material with hand tools if you're so inclined.
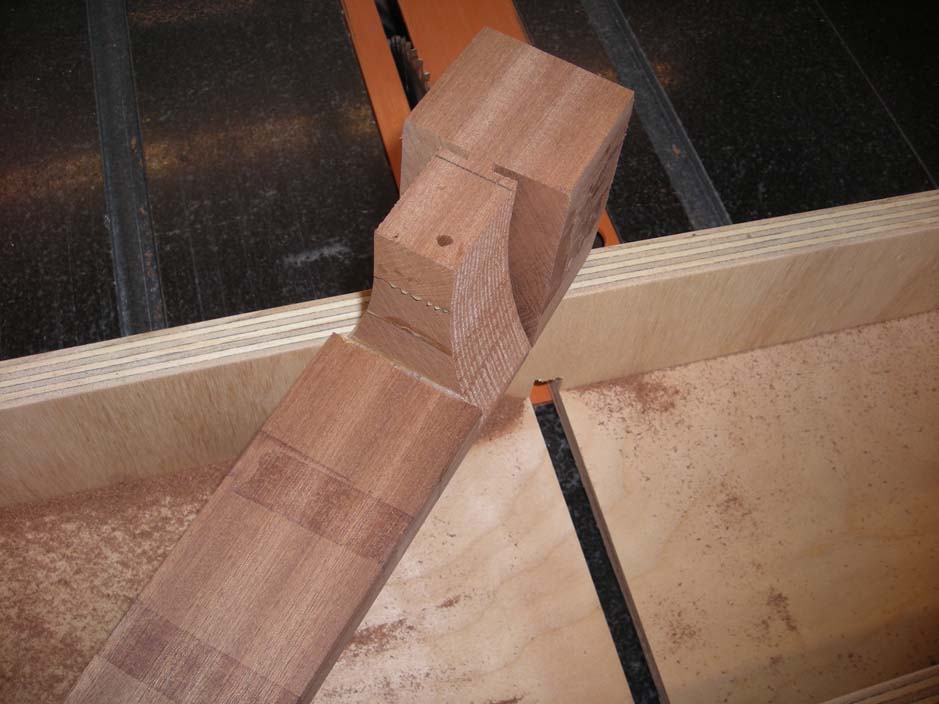
Though we were able to back up and get the scarf joint right, we still had a strength problem with the wrong cut we made earlier. We thought it would hold, but no, it didn't. It broke while sanding.
To address this, we cut two grooves across the headstock and into the neck about three inches. Then we glued in some maple strips. Carving them down was easy and they look like they belong.
Guess what? We later made a jig to properly cut the scarf joint. This sort of mistake can be allowed once.
There's a lot of time spent waiting for glue to dry during a Hana Lima ukulele build. Yes, that applies for all instrument builds. What it gives you is time to work in parallel. For instance, we did some neck work while waiting for the back bracing to dry. We could then come back for some trimming and shaping.
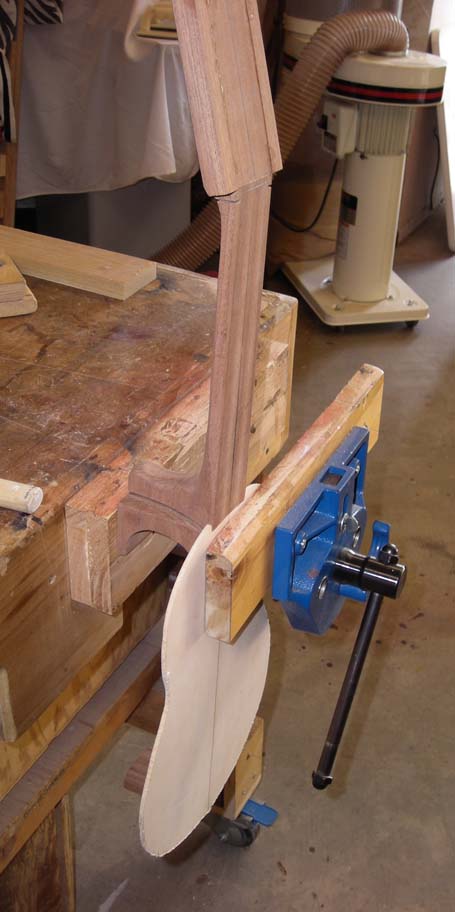
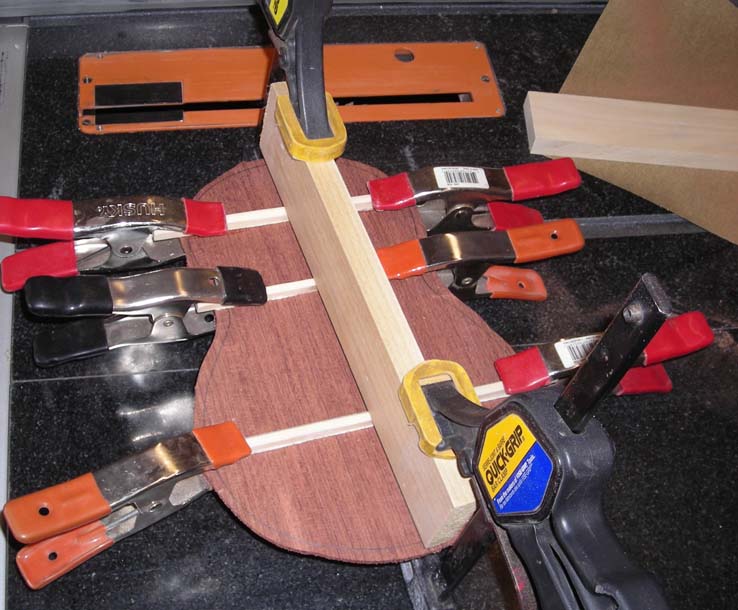
Don't use your vise as a clamp unless you have another vise in the shop. We glued our neck to the top this way due to a shortage of hands. The neck centerline must be perfectly matched to the top.
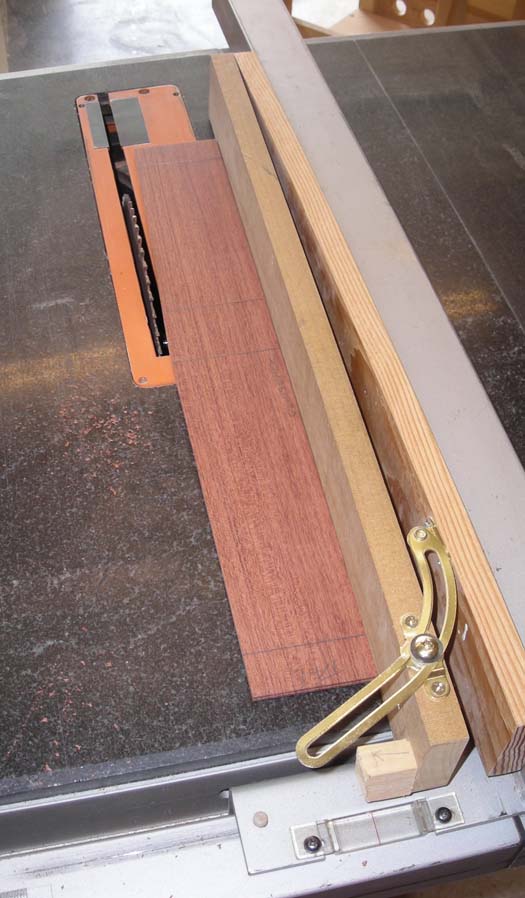
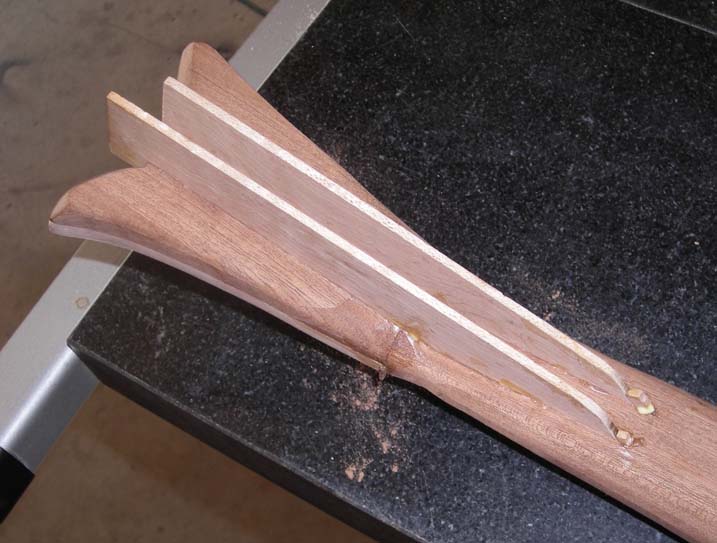
Hana Lima calls for the sides to taper at both ends, with one straight edge. Our table saw guards had to be removed to perform this process. Careful with your fingers.
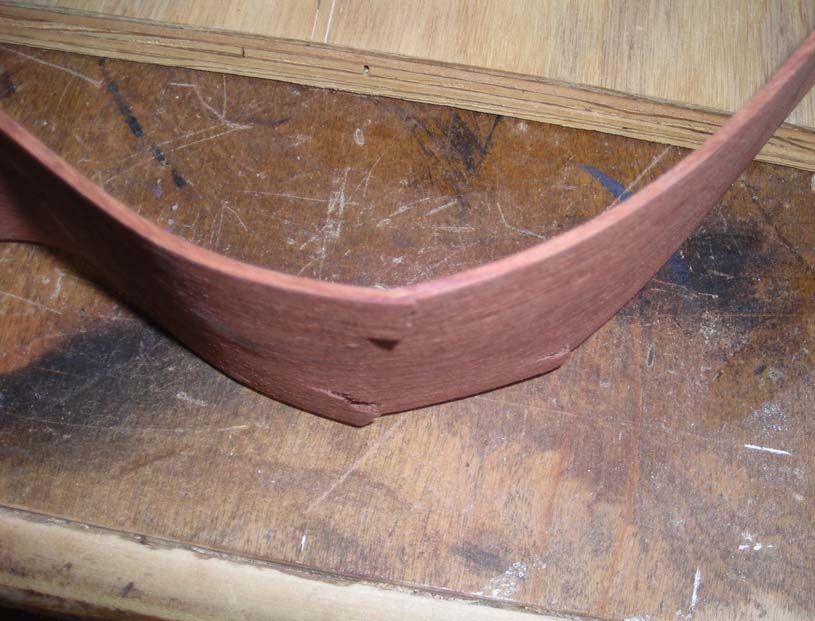
Well crap. Bending sides is not that hard. But do yourself a favor and practice once or twice before bringing your good wood into the game. This piece cracked for a number of reasons. First, it's too thick. Our manual doesn't say anything about side thickness. We later learned that proper thickness depends on a host of factors, but roughly speaking, about .080 inches will work.
Next, the blanket and spring metal must stay in contact at all times during the process.
Finally, it comes down to timing based largely upon experience. As it happens, we had other uke-sized thin pieces of wood in the shop and didn't lose much time.
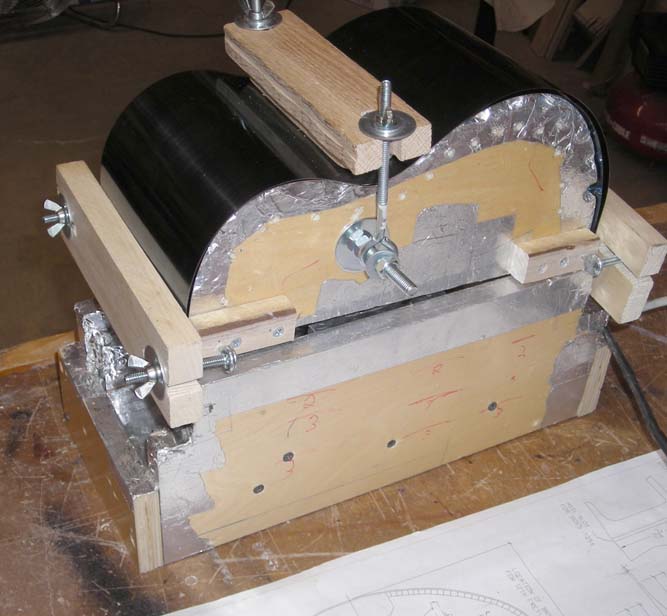
Here's the bending jig we borrowed for our build. You will get as many different answers with as many different people you ask about what bending method is best. If someone can demonstrate for you, all the better. If not, look it up and go for it. Keep in mind that sooner or later you have to shoot the engineer and build the darn thing. ( ...he said after taking three years to get around to his Hana Lima ukulele build!)
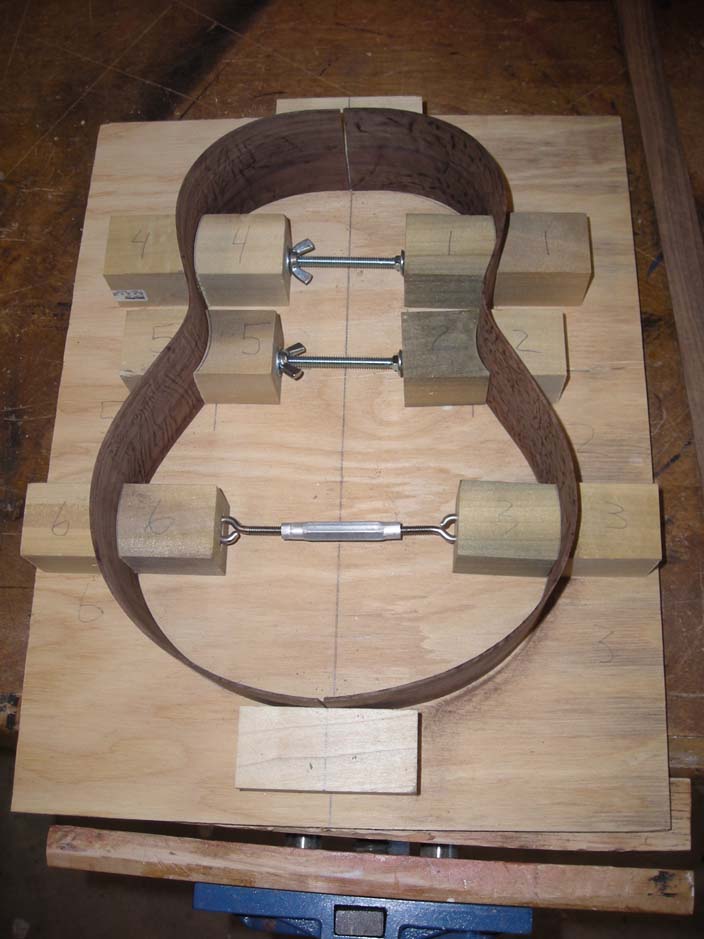
We broke one of our bubinga sides that came with the Hana Lima ukulele build kit. We replaced it with walnut. We had enough to make a one-piece back and two sides. The walnut bent with ease and going through the support/bracing game was much simpler the second time through.
Here we're holding our sides in a jig to convince them to stay where we want them.
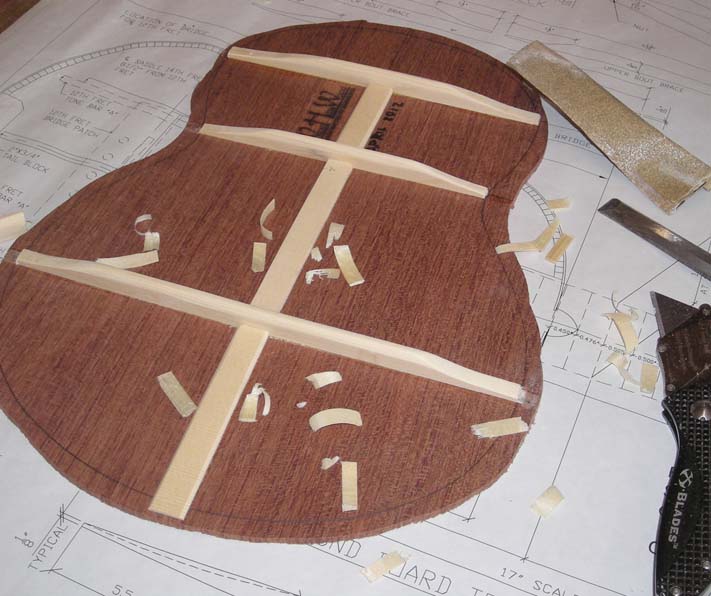
The Hana Lima instructions tell how to make tantalone clamps. They work well and only took us a few minutes to make enough to do the job. Tantalones are glued at the joint of the top and sides to give the body strength. They also go along the bottom, but clothes pins can reach for that operation.
After getting the bottom tantalones in place, the bottom gets glued in place. This must have been a traumatic experience because we don't have any photos of it. Really it wasn't that hard. And we made a jig for the next time.

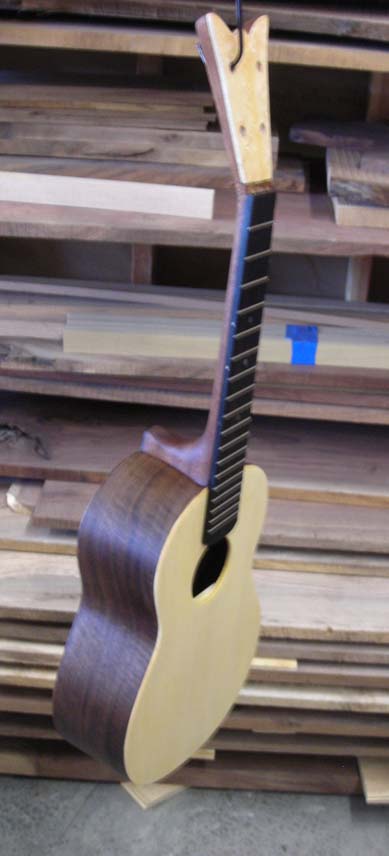
We added some birdseye maple as headstock veneer. It's contrasty, looks good, and hides the neck repair.
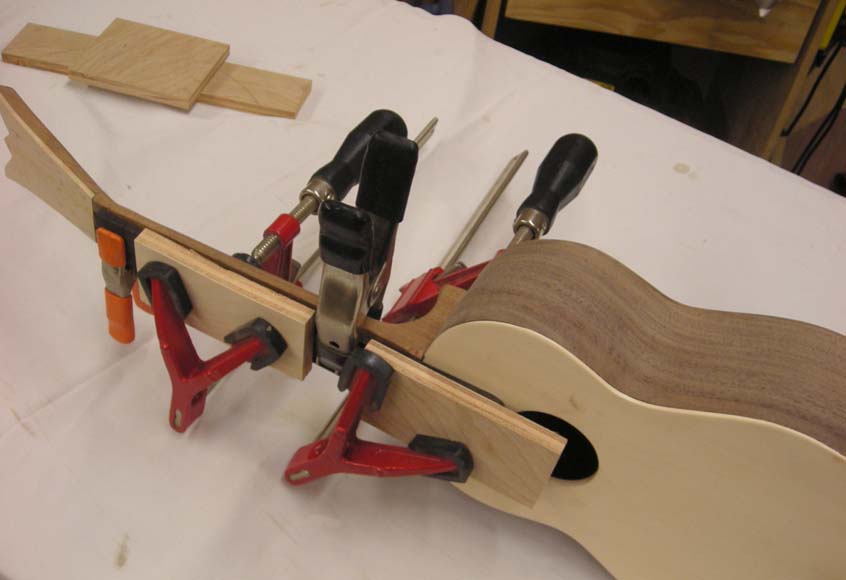
OK, there are a few steps omitted here. We had to cut, place, and shape the frets onto the fretboard. This was nervous time as alignment is critical to the instrument's function. Locator pins were used according to the manual. Multiple clamps with firm (not drastic) pressure were employed.
The rest is really a mater of finish sanding, shaping, and drilling for the tuners. Another mistake we made was in the order of sanding. Our spruce top was done first, then the darker walnut sides. This allowed the fine walnut dust to contaminate the spruce top and our new instrument looks used. Next time...
We used an oil/poly blend for our finish. Multiple coats over several days is best. This is no time to get impatient. We did a reasonable job on the satin finish, but are thinking that the dark walnut calls for a glossy finish.
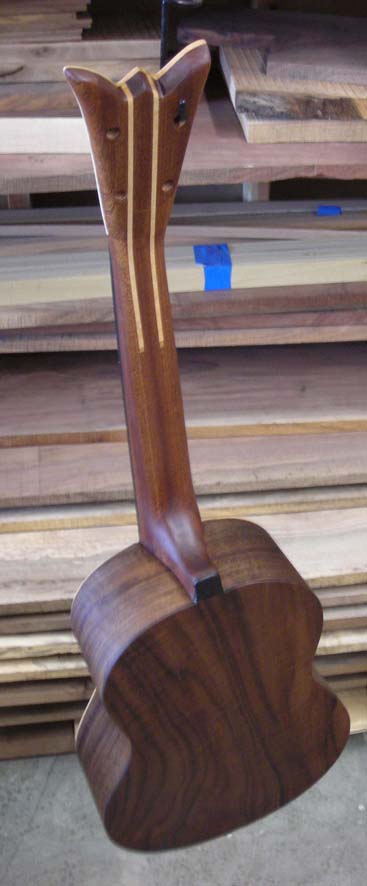
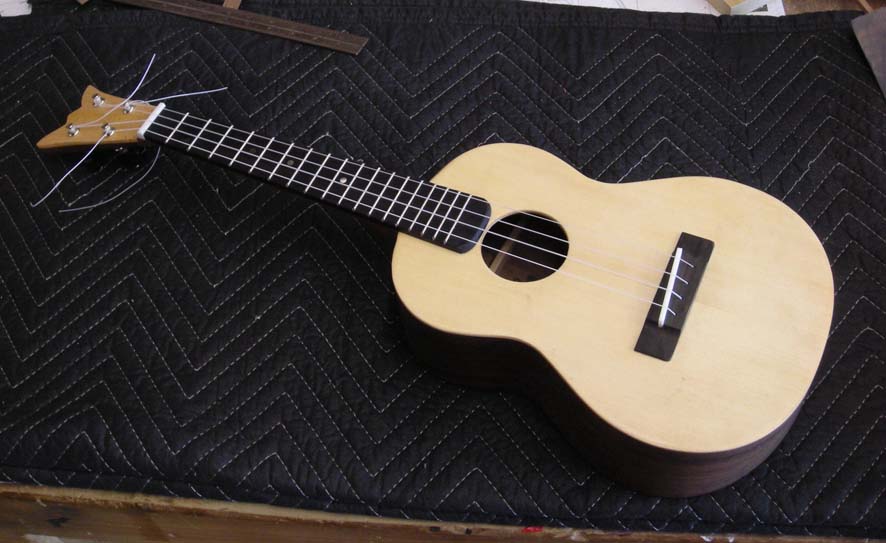
The "W" headstock is derived from our West Hills Wood shop name. The neck fix almost looks like it belongs there. Our one-piece back has terrific figure and grain patterns.
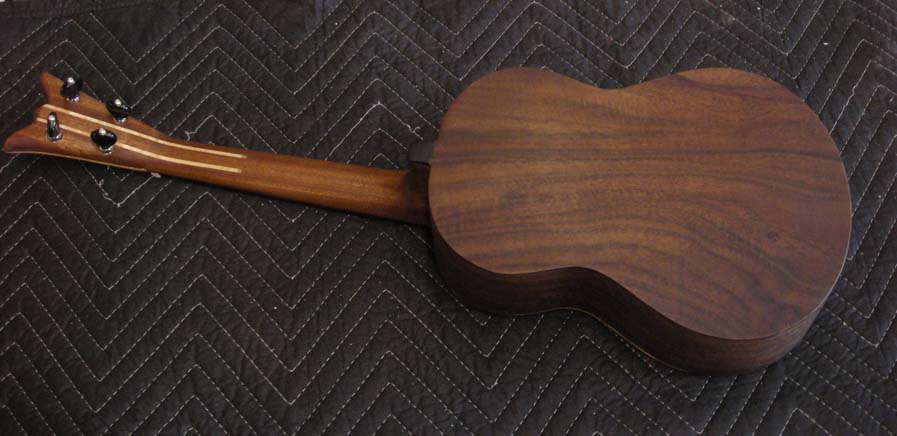
Our Hana Lima 'Ia kit has finally turned into a ukulele! We used Aquila strings and are happy with the warm, pleasant tone. Aligning and gluing the bridge in place was hairy (due to the criticality of sound) but simple enough with a C clamp. We're able to point to as many good things as bad in the construction. And we came away much wiser for the next one.
We're thinking that after five or six builds we'll have the construction process down. Then we can get to fine-tuning and seeing we can build lighter, finely finished, more dynamic sounding instruments. This was well worth the effort.
return from Hana Lima Ukulele Build to Ukulele Build
