|
Bookshelf Plan
A familiar woodworking television show's bookshelf plan just blew us away. They had a neat idea and showed how a few simple modifications could personalize the design. That's all well and good, but they still managed to run right by the rest of us. Even though we're getting pretty good in the West Hills Wood shop, we're not quite up to the level of those guys. As it happens, we recently built our own bookshelf. After adjusting a dozen photos, we can now share our own bookshelf plan. Of course our free woodworking plan does not have a drawing. We don't use them. Oh, no doubt they're handy, but that's not how we do things here.
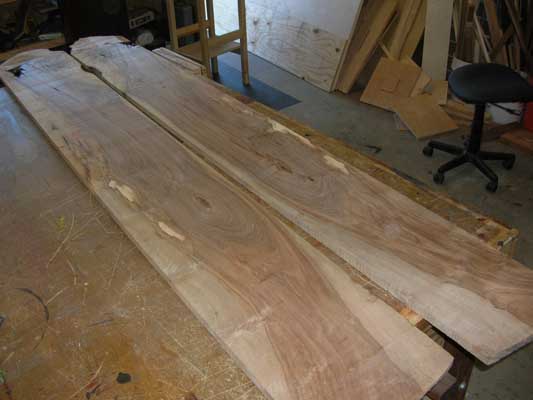
We started out with a couple of walnut boards we had in the stack. Any wood can be used for this project. This is a solid wood bookshelf plan. Many plans call for plywood sides and shelves. That's fine, we wanted to highlight these two boards. Some folks think walnut is terribly expensive. It's not at all. In fact it's right in line with cherry, maple, and other popular varieties. Walnut is readily available, has interesting grain patterning, and can be used for all sorts of projects from fancy to plain.
We are able to dimension our own lumber. But it would be even easier to simply buy your wood already machined. The wood is 3/4 inch thick. A typical book is roughly 9 inches by 12 inches tall and will require a little more room to get in and out of the shelf, so our sides are 11 inches deep. Our space in the house calls for 32 inches tall. This is a single-shelf arrangement. Here we've simply cut the wood and laid it out to see how much we have. What you see is from the top, with the sides and shelf in rough location. The top will come later.
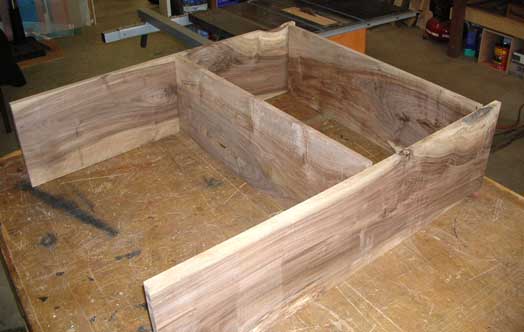
With some experience, you will soon understand how to set up your dado blades to match the thickness of your stock. Our own milled lumber varies in thickness from project to project so it takes us a few tests to get the dado set right. But it's not hard, just takes patience. We ran a groove for the bottom as well as a rabbet along the back. That's it for this process. If you don't have a table saw, you can use a router or old school saw/chisel your way to grooviness. We think that's too hard.
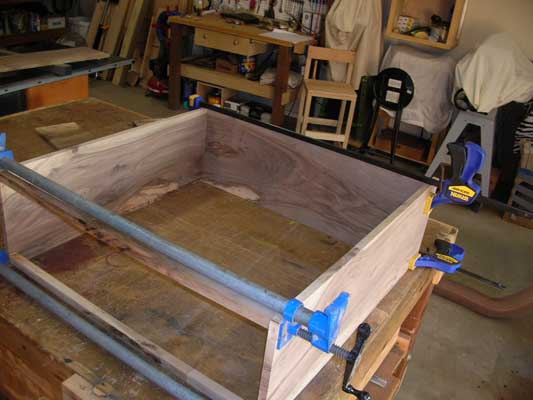
Gluing up the box is straightforward. West Hills Wood is not anti-nail, we just like to make things without them. Our bookshelf plan calls for two 1x1 runners along the top inside edge. There is one nail through each side into the top runner. Maybe it helps, maybe it doesn't. Makes us feel better though.
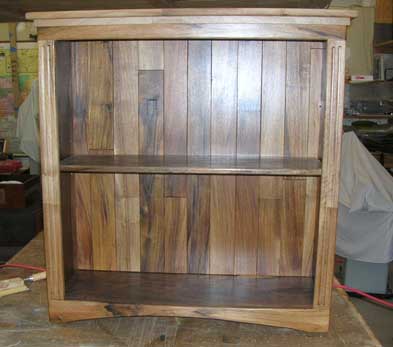
The lower shelf is the same depth as the sides to allow the back to sit on it. A removable shelf (to be added later) will be a little less deep, to allow room to move. It's a little late at this point to make any dimensional changes, but if you get here and decide it needs to be smaller, now's the time to do it. If you want it bigger, you'll need to start again.
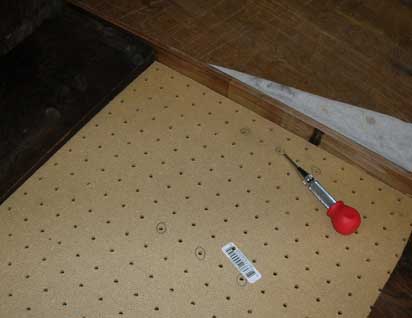
We used a old piece of peg board for the shelf hole spacing. Knowing we were only going to have a single adjustable shelf, there seemed no point in making holes all up and own the sides. We made three. Our shelf was located by eye and then we laid out the hole locations using a spacer board. Do this step before putting the back on. Be careful not to drill all the way through the sides.
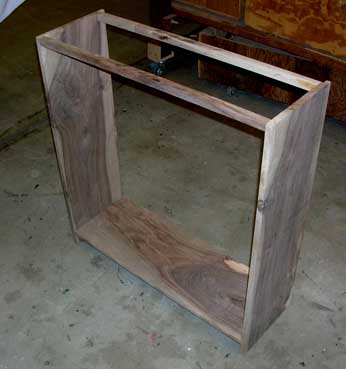
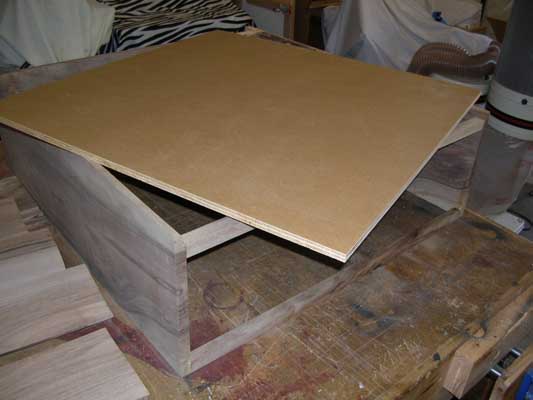
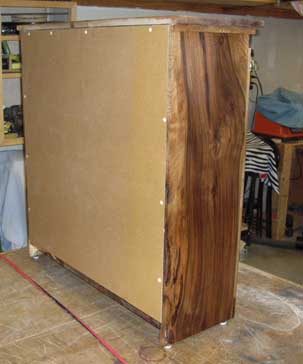
A piece of 1/2-inch plywood adds strength to our bookshelf plan. It's screwed in place along the rabbet we made earlier. Don't cut the back until the case is together. You must allow for slight variations in rabbet depth and assembly quirks. Once together, a simple measurement will give you the right dimensions. We had some thin slices of walnut lying around for some time. They were remnants from another project. So we trimmed and sanded them to use as "siding" for our back panel. The results are just a little over the top, but it was a great way to use up that old thin stuff. They are glued in place.
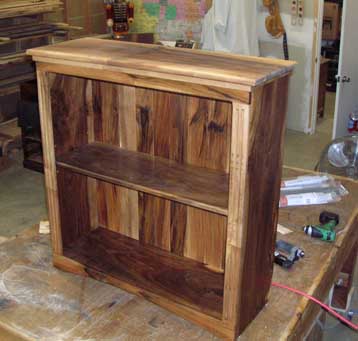
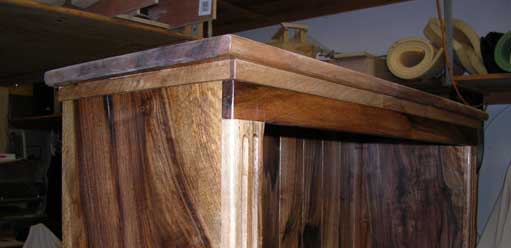
With solid sides and top, our walnut bookshelf plan came together pretty well. Even so, the top didn't exactly align with the sides as tight as we'd like, so a thin strip of trim came to the rescue. Don't feel bad about using this technique to cover gaps, it's used all the time and actually adds character and visual depth to the project. The top was attached by running screws through the 1x1 runners. You can also see that our face frame is simply butt jointed and glued to the front. We ran the stiles (vertical trim) over a fluted router bit for more texture.
Some bookshelf plans call for decorative trim around the upper joint. Use it if you got it. With a bit of finish, our trim blended in quite nicely. It was glued and attached with pin nails.
A look at the back shows the back panel screwed into place. If you look real close, the small white feet are visible. These help keep the unit from marring your floors.
Photography skills at West Hills Wood are about as good as you'd expect from woodworkers. Still, the walnut bookshelf plan came through. We built it as a compliment to my wife's Fletcher desk. The golden tone and grain patterns are awfully strong in these photos, but the in-person result is terrific and suits our need perfectly. We applied several coats of an oil/wax finish (a Sam Maloof product found at the Rockler store) before putting the back on. Finishing requires a different skill set than building. But keep in mind that the project will give you many years in return for the three days you give it now.
|