Ukulele Build
UPDATE!
We have recently completed a Hana Lima 'Ia tenor ukulele!
Keep up with West Hills Wood by following us on Facebook. We post every Wednesday!
We wanted to build a ukulele using a kit provided by Hana Lima 'Ia, located in Honolulu, Hawaii. They offer a training school for aspiring ukulele luthiers, but timing doesn't allow for us to spend two weeks on the island (darn the luck), so a kit it is!
This particular kit is actually a Stewart-MacDonald kit for soprano sized ukulele. The sides are one piece and pre-bent. Fully illustrated instructions are decent but must be read and followed very carefully. We made an error or two along the way. The kit includes everything you need except tools, glue, and finish.
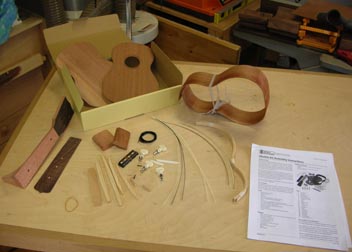
Expect to use a lot of clamps and hand tools. In fact, you can probably perform this ukulele build without the use of power tools. We'll admit to finding a couple of power tools handy, though. This project was completed in one five-day work week, finishing time not included.
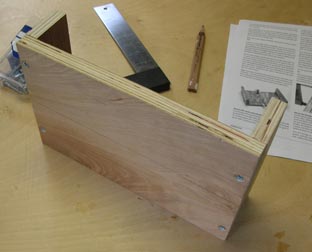
The first thing needed is a plywood jig to hold the sides in place during the process. It's a bottom and two sides with waist blocks at the appropriate locations. Center lines drawn on the jig are helpful when aligning parts.
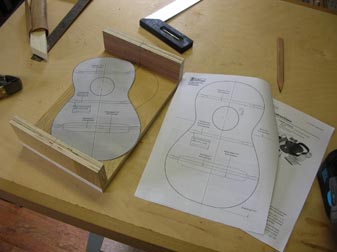
The instructions call for you to cut out the template and trace the figure onto your jig. Trouble is, there are instructions on the opposite side of the template page. Make a full-sized copy and go from there.
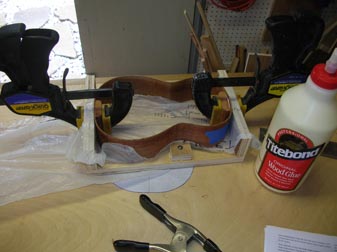
Use plastic or wax paper to keep the glue from sticking your ukulele parts to the jig. Here, the end blocks are being positioned for gluing. Instructions encourage you to test fit by dry clamping before adding glue. That's always a good move.
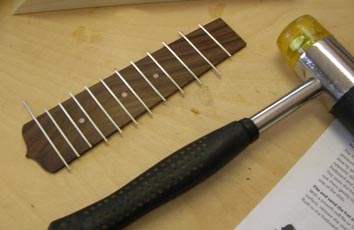
You can spend a lot of time waiting for glue to dry during this ukulele build. We chose to skip ahead when possible and perform other steps while waiting. Here we have the frets being hammered into the pre-cut fret slots. A standard hammer will damage the soft metal fret wire. Don't leave too much overhanging wire or you will run short.
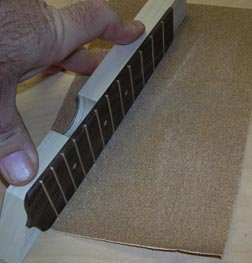
After nipping the fret ends, smooth the rough edges by rubbing them along a piece of 100 grit sandpaper. Use a piece of wood as a guide to keep the edges square.
Once the edges are flush with the side of the fret board, some fine finish work is required to make the frets ready for playing.
The pre-cut ukulele neck and fret board look like they were made for each other. Of course they were! This is one place where we did not want to make a mistake and were glad to have a kit for our first ukulele build.

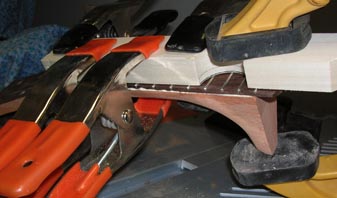
The sides are too thin to glue the top and bottom to, so wood linings are added for depth and strength. Expect to use a lot of clothes pins. We bought a set of 96 pins for about $4 and used most of them. Individually they are not very strong. But side-by-each they do a great job.
Gluing the top happens before the bottom. The top is flat, making it a relatively easy setup. We used a shop towel to keep the pressure even against a piece of scrap plywood. The bottom edge is flat against the jig bottom for sturdy clamping.
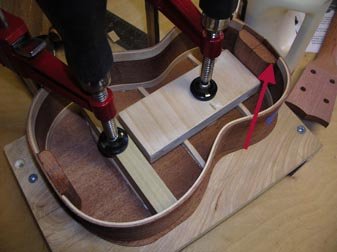
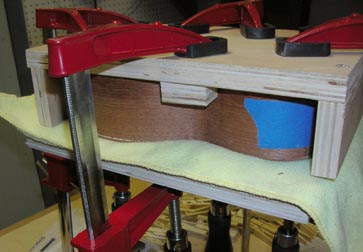
The red arrow shows where we messed up at an earlier step. Our linings should have been located to match the top edge of the end block. On the finished instrument, the back tapers toward the front to increase sound. This is where it happens. We had to fix this.
In this shot, we are clamping in the top braces.
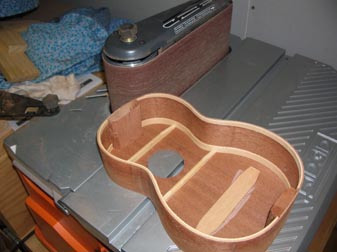
Gotta love a well equipped shop! We discovered our lining error when trying to align the bottom. Fortunately, there was enough lining left after carefully using our sander to narrow the sides. Keep in mind the top and bottom edges must be flat before gluing the top and bottom on.
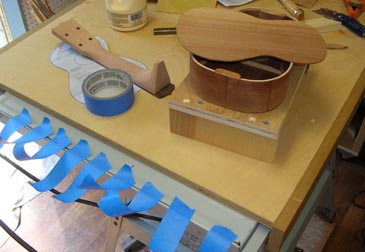
We weren't sure how we were going to clamp the bottom in place. Then we decided to use tape. With hands at a premium, we tore off numerous pieces of tape ahead of time.
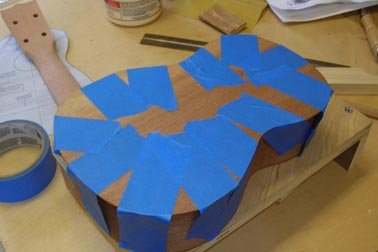
We used all the tape as well as a couple of strategically placed clamps to attach our bottom. Make certain to get glue all the way around or you might induce a buzzing noise when trying to play your ukulele.
A flush trim bit on our new router table made quick work of matching the top edges to the sides. A small plane or sharp knife would also get through the thin top material, but will require much more patience.
Aligning and attaching the neck assembly to the body must have gone pretty easy. We didn't get any pictures of it. The big key is making sure the neck brace and body match up for a tight fit along the entire joint. You also need to ensure the fret board is located on the body's center line.
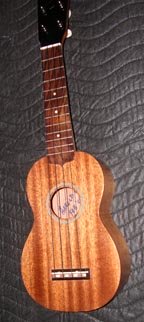
Then it's off to the West Hills Wood high-tech spray booth for a few coats of spray-on lacquer. We could have spent more time to get a super-shiny finish or hand-rubbed sheen. But this ukulele build was done with an eye toward eventually building one from scratch and the decision was made to let it go with a basic finish.
From smallest to largest, ukuleles come in soprano, concert, tenor, and baritone sizes. There are more varieties, too be sure. We picked one up a couple of months ago almost on a lark and discovered they are fun and easy to play. The more we play, the more interesting it gets and people keep smiling when we do it. El-Cheapo brand ukes can be had for as low as $25. El-Fancio ukes can go for thousands. This ukulele build kit cost about $90.
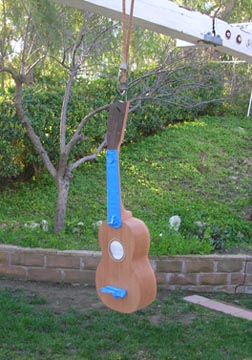
We don't yet know how it sounds as we have to wait for the nylon strings to stretch out a bit before settling in. Our goal was to build a ukulele and we did. It's pretty, it didn't take up too much time, and we learned a few lessons. Sounds like a typical West Hills Wood project!
UPDATE! August 2011
My how far we've come in two years! That StewMac ukulele has found a place of honor on the shelf next to my old karate trophy and art-deco clock I bought in Alaska last year. It plays well enough, but I never really worked that hard on it and I got so distracted by the Fletcher Desks that I never got back to building ukuleles.
I've kept playing, though, and now lead a group called the Canogahana Players that meets regularly over at
Guitar Merchant in my neighborhood. We even hosted a Lil' Rev concert. All good in the ukulele world.
