|
Wood Desk Plan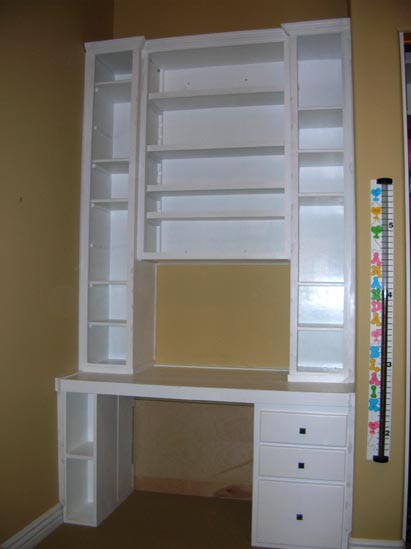
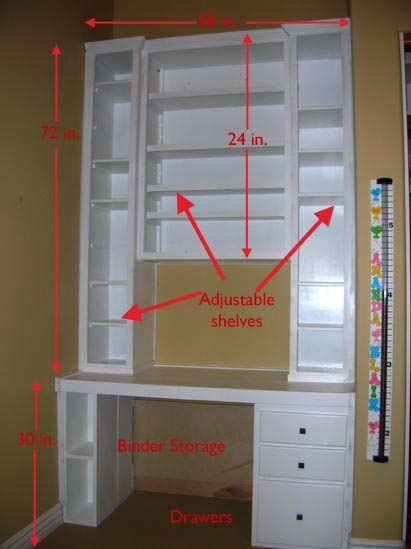
"Can you make me something to fit a space?" These wood desk plans are general in nature. A friend asked if we could build a simple desk and bookcase to fill a tall alcove in a bedroom. Not having sense enough to say no, we took the job. We apologize right up front here for not having photos of the lower desk parts. If someone were responsible for taking pictures, we'd fire them. The main parts of this unit are simple plywood cases. There are two 6-ft tall cabinets framing the center bookcase. This sits atop a desk consisting of three drawers to the right and a space suitable for books/binders on the left. Knowing that the top would occasionally be stood on, we used two layers of 3/4 inch birch plywood for the desk top with a 2 inch poplar trim piece. The space is 58 inches wide and nearly 10 feet to the cathedral ceiling. Yeah, this is a large space.
Every exposed end of the plywood is trimmed with poplar strips cut to fit. All shelves follow this same procedure. As a built-in, we also trimmed the edges against the wall. To add a little flair, we used a decorative pine material for the crown top.
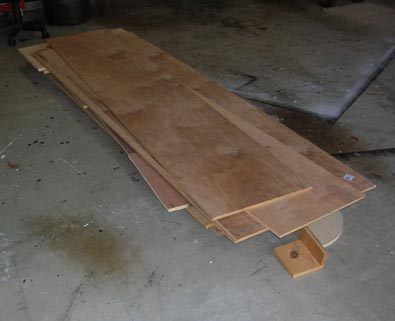
Handling 4 x 8 sheets of plywood by yourself is tough work. Your best route is to layout your dimensions on a drawing and have the home center cut your plywood into handle-able sizes. Our wood desk plan called for four sides at 14 x 72, two sides at 12 x 48, and two (desk top) pieces at 30 x 58. And a host of smaller ones that we could deal with ourselves.
Putting the cases together can be difficult as the sides are unwieldy. We used some spring clamps and one of our right-angle saw guides to help keep things aligned while driving the screws.
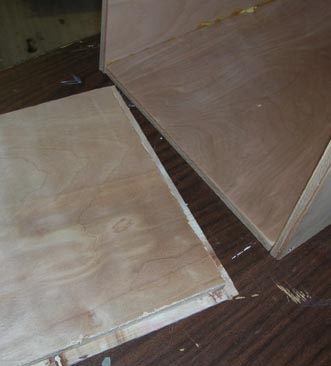
Butt joints with glue and screws will be strong enough for most applications, but we like to get at least one side (usually the back) rabbeted to help hold things together.
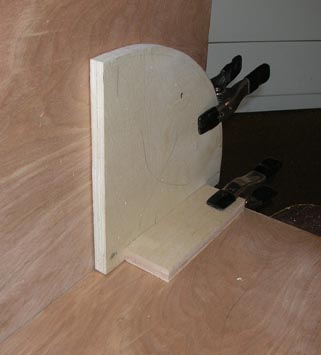
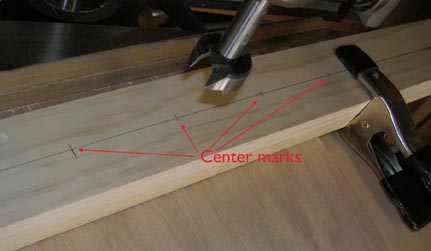
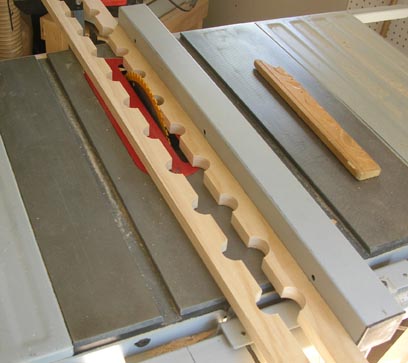
For the bookcase section of our wood desk plan, we went with a wooden slot adjuster instead of pegs for the shelves. The adjuster is 3/4 x 8 x 1 1/2 with rounded ends to fit into holes attached to the case itself. Sounds complicated, we know, but the image above shows how we laid out for drilling. The image below shows the same piece after running it down the middle through the table saw. Doing two boards at the same time gets us four support sides with exactly the same dimensions, hole size, and spacing.
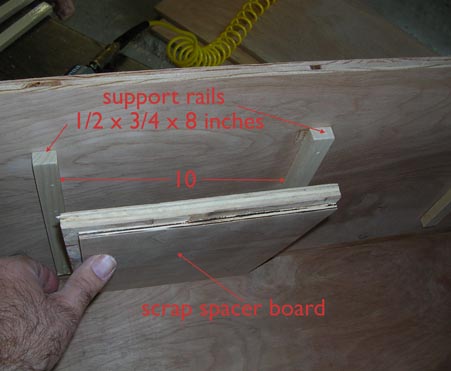
For the tall side cases, the wood desk plan calls for a simpler approach. We used thin rails glued and nailed in place. To set a consistent spacing, we cut a scrap piece of plywood to size and set it in place between the top of the case and the first rail. Then the spacer went between the first rail and the next. And so on. Using the spacer saved a lot of measuring and figuring. We decided on the spacer dimensions by measuring the overall space and dividing it into equal parts. Of course we used the same approach on both side cases. 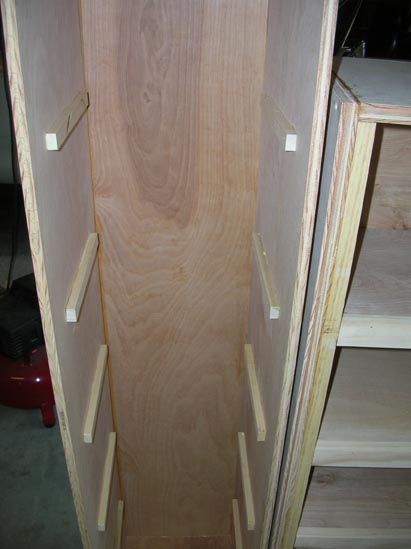
Gravity fit well within our wood desk plans. We attached the top with screws to the side and drawer assemblies. The three top parts were bolted together and long screwed into the wall studs. The upper assembly rests on the desktop. Our customer wanted the top to be 6 feet tall, over the desk top. She also wanted the open space beneath the bookcase to allow for a cork board. We'd have preferred to see the top urethaned, but she insisted on white paint and we delivered. This project looks daunting for beginning woodworkers, but the basics are there. Simple case construction, balance of space versus components, final assembly. Contact us if you need more detail on the wood desk plan. West Hills Wood doesn't build from formal plans. We're guessing that it slows us down most times. 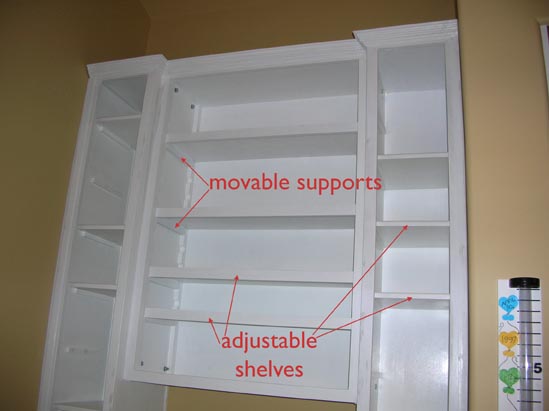
While not a piece of fine furniture, this wood desk plan should get you some ideas on how to fill that corner space in your home. And with some different materials and finishes, you can make it look pretty. Send us a picture of yours and we'll post it.
|