Flashlight Holder
We make a lot of random pieces and put most of them on our Facebook page each Wednesday.
This flashlight holder solved a problem for us at West Hills Wood. We have these neat flashlights around for whatever flashlights are used for, but we keep having trouble figuring out how to find them. Seems they get picked up, used, and set down in a variety of places.
So we fixed the problem one day by making this fun to build flashlight holder out of pieces from the scrap bucket. The whole project took about an hour.
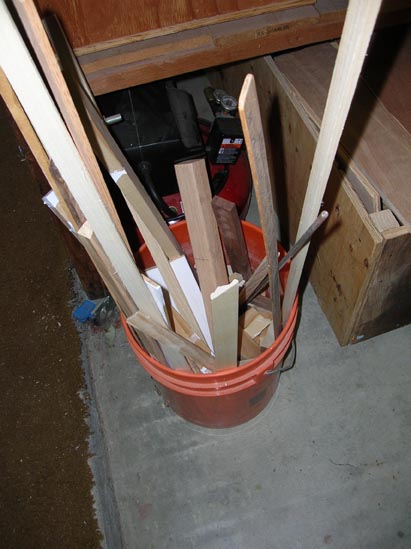
We started at the scrap bucket. Knowing this project would be small, we knew there would be enough material in here to make the flashlight holder if we remained flexible with our design. We did not draw out any plan. Heck, it would have taken longer to draw the plans than to make this holder anyway.
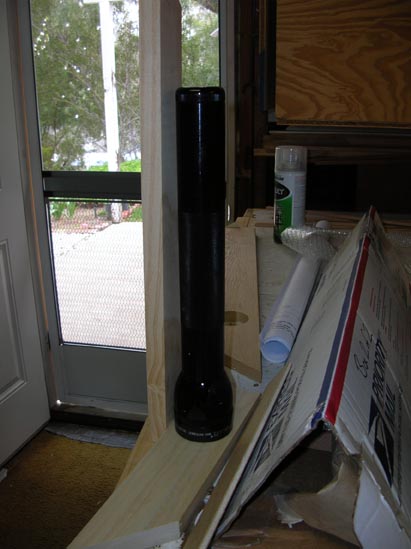
We didn't get overly technical with design, as you can see. We held the flashlight alongside a few pieces from the bucket and picked our parts from there.
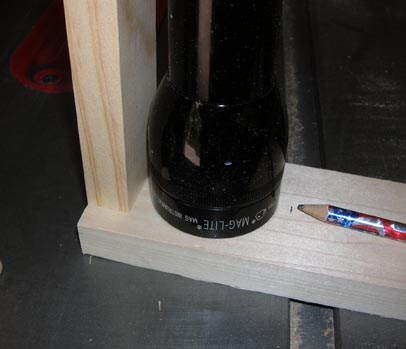
Measurements will vary, depending upon the flashlight you wish to hold. We set our flashlight against the post and marked our lines by sight.
The base needed to have sides to contain the flashlight. We used 3/4-inch pine for the back post and bottom, then 1/8-inch plywood for the bottom sides. Again, measuring by sight worked very well.
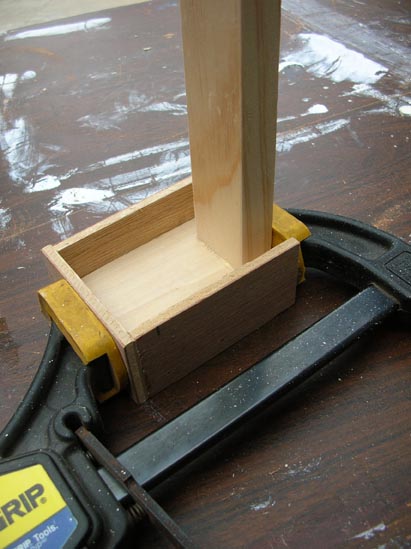
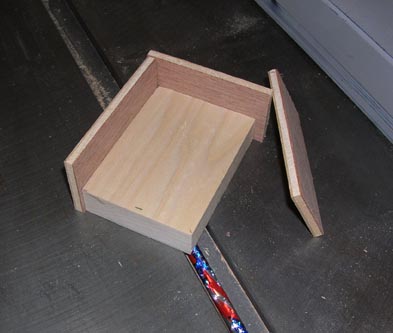
Glue was not really needed, but we used it out of habit along with some small finishing nails to build the base walls. Even with pre-drilling, screws can split pine easily. We used glue for the bottom to back joint along with a nail or two.
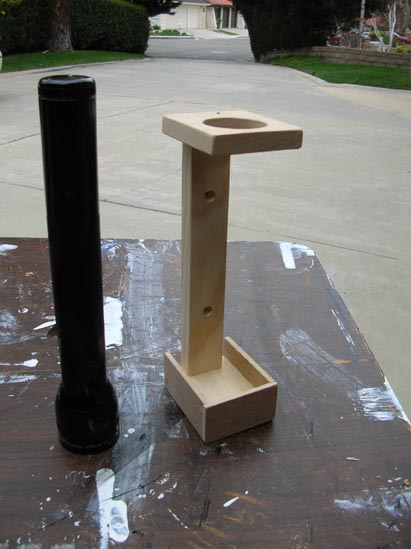
The top hole was cut large enough to allow the flashlight body to move freely through it. We used a Forstner bit, but could have used a hole cutter (for doors and such), or drilled a small hole and cut it out using a jig saw. Rounding over the edges will keep splinters to a minimum.
The top to bottom distance ratio must allow for the flashlight to be lifted into and out of the holder. We experimented a couple of times before getting ours right and finally cutting the back post.
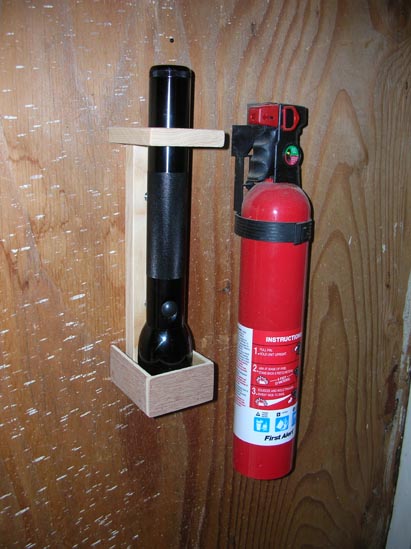
Here's our finished flashlight holder. It is located next to the fire extinguisher, right next to the garage entry door and srewed securely to the wall.
This would have been an even simpler project if we let the flashlight hang on a hook. But that would allow the lens to get dusty and eventually render the light useless.
We applied no paint or other finish. We did smooth all edges with sandpaper.
Bottom sides will hopefully hold the flashlight in place during an earthquake and they certainly help contain the piece during normal days. With this addition to our garage, our nifty flashlight is easy to find and gets put away every time. It sure beats looking all over the place.
Building useful, visual projects like this will help your kids appreciate the work they've done.
